How to Make Lips Look Fuller: 3 Budget Liner Dupes
A lip plumper that tingles isn't proving it works. It's proving it's irritating your skin, and short-lived swelling from irritation is not the same thing as volume.
Fullness you can control comes from somewhere quieter: contrast. Where the visible edge of the lip sits, how dark that edge reads, and how much light lands in the centre. Move the border a millimetre or two at the right two points and lips read fuller. Run it around the whole mouth and they read drawn on. That distinction, between optical fullness and real volume, is the honest answer to how to make lips look fuller.
This post may contain affiliate links, which means I may receive a commission if you purchase through my links, at no extra cost to you. Please read the disclosure policy for more information.
It sits near the top for a reason: the Federal Trade Commission's endorsement guidance uses the principle that readers shouldn't have to hunt for a disclosure, so it doesn't belong in a footer.
What Makeup Can and Cannot Change About Lip Fullness
Liner and lipstick work on the surface of the lip, so they change how full a lip appears without changing how full it is. Two things create the impression. The boundary comes first: liner placed just outside the natural vermilion border redraws where the eye thinks the lip ends. Light comes second: a lighter or glossier centre reflects more than the edges, and a bright spot inside a darker shape reads as a curve rather than a flat plane.
Lip plumpers go after a different mechanism, and it's worth knowing exactly what you're buying. Poison Control explains that plumpers may contain capsicum, caffeine or bee venom, ingredients that irritate the skin, increase collagen and elastin production or dilate blood vessels so the lips look swollen (Poison Control). The reflective finish does real visual work. Part of the plump, though, is inflammation, and irritation is a side effect rather than a feature. Stop applying a product that burns, swells, itches or otherwise misbehaves.
Real volume is a medical purchase, not a cosmetic one. In 2024, U.S. practitioners performed 1,449,565 lip-augmentation procedures using injectable materials, according to the American Society of Plastic Surgeons.
Hyaluronic-acid filler is the best-studied version of that, and the numbers deserve to be seen in full. A 2021 meta-analysis found that 91% of treated participants reached at least a one-point improvement in lip fullness two months after injection, with a 95% confidence interval of 85% to 96%, declining to an estimated 74% at six months and 46% at twelve months (National Library of Medicine). Tenderness affected 88.8% of participants, injection-site swelling 74.3% and bruising 39.5%.
The line to hold onto: liner changes what your lips look like. Filler changes what they are. Only one of those comes with bruising, swelling and a clinician's fee.
If you're weighing the injectable route, start with a consultation rather than a booking, and read up on non-surgical lip enhancement so you know what to ask about product choice, volume per session and what happens if you dislike the result. What follows is the makeup route in full: a zone-by-zone liner map, a six-step routine, fixes for harsh lines and irritated lips, three budget picks, and the proportion rules that keep any of it from looking fake.
Liner Placement Map and Overlining Routine
Keep the overline at the centre. Extend just beyond the natural border at the cupid's bow and lower-lip centre, then leave the corners on or slightly inside their natural outline.
| Lip zone | Liner extension | Shade and finish |
|---|---|---|
| Cupid's bow | 1 to 2 mm beyond natural border | Close-toned liner, light gloss at the peak |
| Lower-lip centre | 1 to 2 mm beyond natural border | Slightly lighter centre shade, pinpoint gloss |
| Lip corners | 0 mm, stay on or inside the outline | Blend with a deeper neutral, keep it matte |
| Whole perimeter | 2 mm or more | Avoid, it creates a visible sticker edge |
Facial-proportion research offers a useful guide to balance: upper-lip height tends to read best at roughly 20% to 25% of hemi-lip width. In the cited study, measurements above 30% were generally judged unattractive, and the preferred upper-to-lower lip relationship ranged from 0.618:1 to 1:1 (National Library of Medicine). In practical terms, keep the upper lip slightly smaller than or equal to the lower lip.
Overlining the whole perimeter can make the border look flat and visibly separate from the mouth. Focusing on the central peaks creates the impression of added height while preserving the lip's overall shape. Treat 1 to 2 mm as a conservative practical limit, not a validated benchmark.
Adjusting the map to your own lip shape
Lip dimensions vary across faces and change with age. Three-dimensional measurements from 918 healthy people aged 4 to 73 found age- and sex-related differences in vermilion height, mouth width and total lip volume. Lower and total vermilion dimensions increased through adolescence and later declined with ageing (PubMed).
For thinner or mature lips, stay near 1 mm and soften the border rather than drawing a sharp outline. Naturally full lips often need little or no overlining; a touch of centre shine can add definition without making the outline look heavier. For asymmetry, extend the smaller side only.
Check in daylight: if you can trace the liner at arm's length, soften the edge before adding more product.
The routine, step by step
- Find the natural border, including the corners. Work in neutral daylight with a small mirror. Mark the corners first so the outline does not drift outward.
- Mark the extension points. Place one just outside each cupid's bow peak and one at the centre of the lower lip, staying within 1 to 2 mm.
- Connect the points to the corners. Curve gently inward. Straight lines can make the mouth look squared off.
- Fill inward with a close-toned liner. Keep the corners deeper and matte, then bring the colour closer to your natural lip tone toward the centre.
- Add a lighter shade or a pinpoint of gloss. Place it at the centre of both lips. Keep shine away from the edges, where it can look sticky.
- Soften the outer line with a fingertip or small brush. Check the result at arm's length and blend any visible pencil edge.
The aim is a fuller-looking centre, soft corners and an outline that does not announce itself.
Three Budget Liner Dupes Worth Buying
| Product | Best use | Shade tip |
|---|---|---|
| NYX Professional Makeup Slim Lip Pencil | Defining the cupid's bow | Nude brown or rosy nude |
| Maybelline New York Lifter Gloss | Centre shine on the peaks | Clear or light nude |
| Maybelline New York Color Sensational Lip Liner | Lower-lip centre work | One shade lighter than your natural lip |
Here's the pencil in question, and the kind of small mirror that makes step one easier.
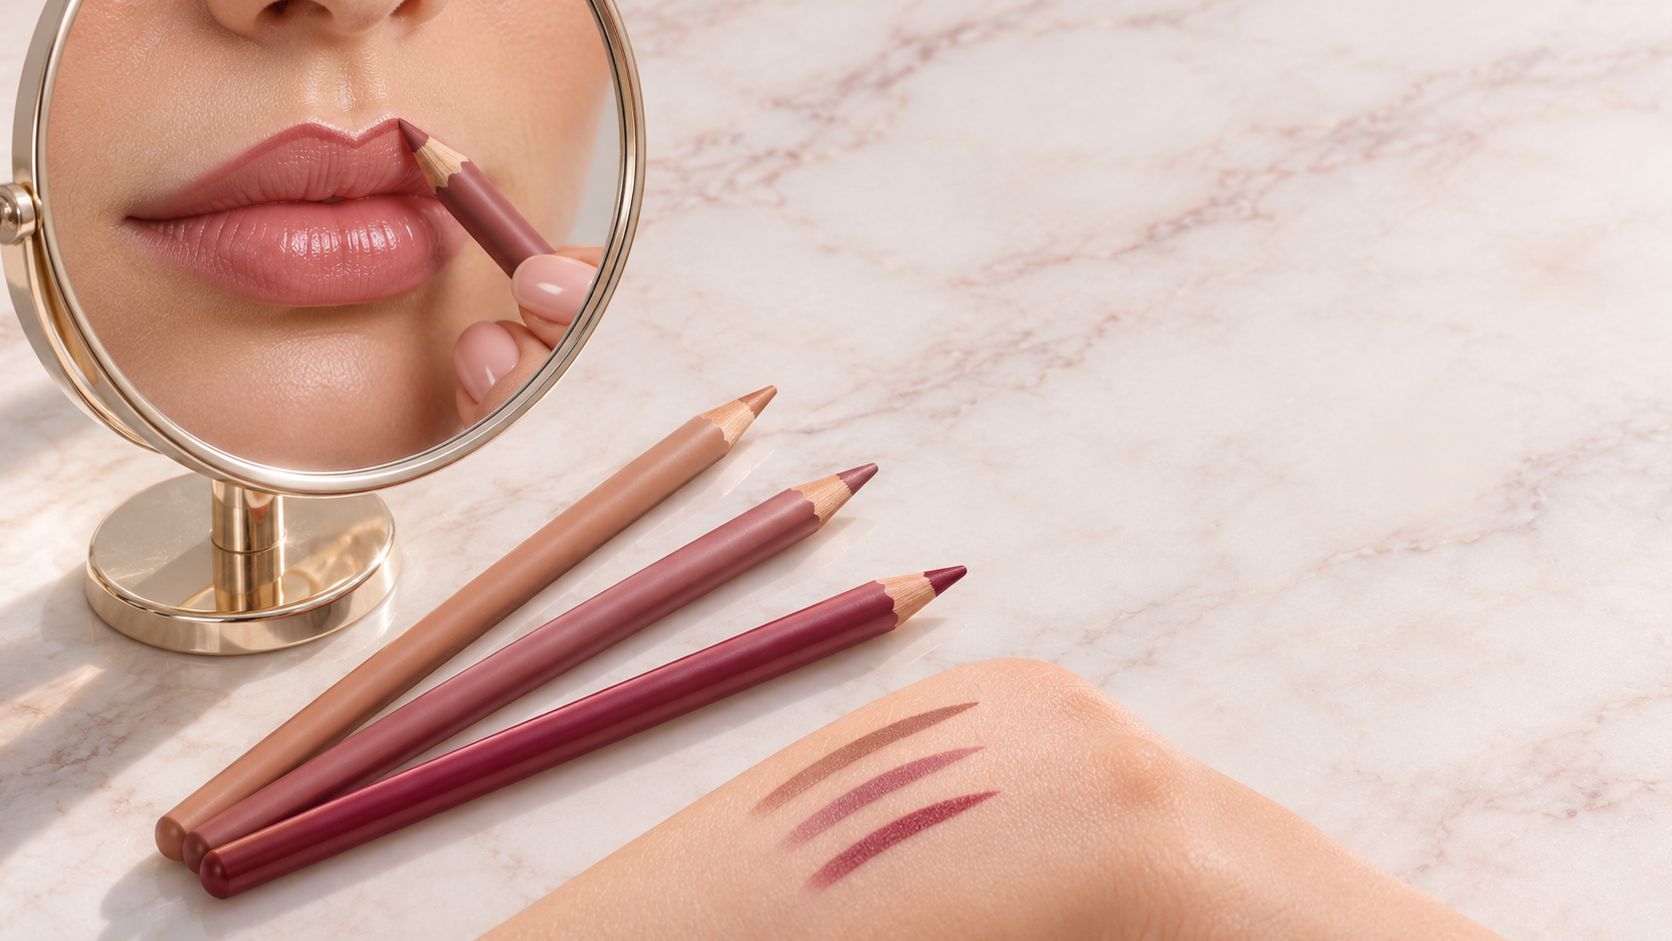
NYX Professional Makeup Slim Lip Pencil does the heaviest lifting, because the cupid's bow is where the effect is decided. The slim barrel gives you a point fine enough to draw 1 mm outside the border without a waxy smudge, and the shade range means you can buy a nude brown or rosy nude that sits just inside your natural lip colour, so a slip blends instead of showing. The limitation is texture: it's a dry pencil that drags on mature lips. Lay down a thin balm, give it a minute, then draw.
Maybelline New York Lifter Gloss supplies the light. Press it into the centre of both lips, over the filled liner, rather than swiping it across the mouth. Clear or light nude keeps the shine from turning milky over a deeper base. The trade-off is honesty about wear: it transfers, it dulls, and it needs a top-up after lunch.
We keep dupe sections for drugstore, makeup, skincare and fragrance products, plus Charlotte Tilbury, if you'd rather compare more options before you commit to a shade.
Maybelline New York Color Sensational Lip Liner is the backup nude for lower-lip centre work. It's softer than the NYX pencil, which makes it quicker to fill with but less precise for a sharp peak, so use it after the shape is already set. Pick the shade one step lighter than your natural lip and keep the centre the lightest point of the gradient.
Here's the placement in motion, from bare lip to finished edge.
Test any shade on the inner wrist before you buy, and recheck it under daylight rather than shop lighting. Prices move, so look at the shelf or checkout price where you shop and confirm the product is still stocked, since drugstore lines get discontinued without much warning. None of these picks replaces a patch test if your lips are reactive.
If I had to name one, it's the NYX Slim Lip Pencil, because most of the visible change comes from the first few millimetres of pencil at the cupid's bow.
Fixing Harsh Liner and Irritated Lips
Two different problems get filed under "my lips look bad in lipstick", and they need opposite fixes. One is a technique problem: too much liner in the wrong place. The other is a skin problem: a product that's irritating you.
| Symptom | Likely cause | Fix |
|---|---|---|
| Hard sticker edge | Whole perimeter overlined | Pull the extension back to the centre peaks |
| Visible line inside the lip | Dark liner left unblended | Blend the edge and choose a shade closer to your lip |
| Mild tingle, lips look puffy | Expected reaction to a plumper | Keep use short and stop if it intensifies |
| Burning, itching or spreading redness | Irritant ingredient or allergy | Stop, rinse, and patch test before reuse |
| Blistering or swelling that persists | Serious reaction | Stop the product and see a clinician |
The sticker edge is almost always a perimeter problem. Pull the extension back to the cupid's bow and the lower-lip centre, reconnect to the corners, and it disappears. A hard line sitting inside the lip usually means a dark pencil was drawn and left unblended; soften it with a fingertip and switch to a shade within a step of your natural lip.
Telling a tingle from a warning sign
The ingredient list matters more than the marketing. A PubMed review documented allergic contact dermatitis linked to lipsticks, balms, glosses, liners and lip plumpers, with reported triggers including castor oil, benzophenone-3, gallates, waxes and colophony (PubMed). If you've reacted to a lip product before, those are the names to scan for.
Visible plumping can reflect inflammation rather than better hydration or structure, which is exactly why "it works" and "it stings" get confused with each other. A brief tingle that fades is one thing. Burning, blistering, spreading redness or itching means stop, rinse, and retire the product.
Patch test properly: a small amount on the inner forearm or behind the ear, then wait 24 to 48 hours before it goes anywhere near your mouth. Testing on the lip defeats the entire purpose.
Skip plumpers if you have eczema, sensitive skin, a fragrance allergy or a history of cold sores, and check with a clinician first. Swelling that persists beyond a normal reaction needs medical advice, not a different balm. If the skin is already raw or flaking, this comparison of Aquaphor lip repair vs healing ointment explains which occlusive to reach for before you put colour back on.
Common Questions About Fuller-Looking Lips
Is lip filler better than liner?
Better at what, is the question. Liner changes only how lips look, while hyaluronic-acid filler changes tissue volume and carries procedure risks. The published workflow starts with a consultation and anatomical assessment by a qualified, experienced injector, commonly uses 1 to 2 mL per session, and rules out self-injection or salon treatment (National Library of Medicine).
Can plumpers make lips fuller permanently?
No. The effect is temporary and partly irritation-driven, so the result fades with the swelling. If a product burns rather than tingles, stop using it.
Does overlining work for thin or mature lips?
Yes, with a narrower map. Extend the cupid's bow only, leave the lower-lip corners on the natural line, and soften the edges with a blended shade rather than a hard pencil line.
Is liner safe for sensitive skin?
Usually, if you run the patch test first and skip fragrance-heavy formulas. Keep the pencil off broken skin and give your lips a bare day between long wear sessions. For finish and application order, our guide to how to apply lipstick perfectly covers the layers around the liner.
Pick Your Fuller Look Before You Buy
Fuller-looking lips come from controlled placement, not drawing as far beyond your natural shape as the pencil allows. Extend the cupid's bow and lower-lip centre by no more than 1 to 2 mm, keep the corners on their natural line, and add a pinpoint of gloss to the centre peaks. The NYX Professional Makeup Slim Lip Pencil is a budget option from the earlier picks; the placement matters more than the brand.
Try the map once in daylight before buying another liner. Match the pencil to your lip tone with this guide to choosing a lip liner shade.
A plumper should never be judged by how much it stings. Patch test first, and stop using it if you notice burning, blistering or spreading redness. If you're considering injections, choose a qualified clinic that begins with a consultation before any treatment. A spa-like setting for Juvederm in Miami is one option to explore.
The goal is proportion, not maximum size: a softly defined centre and untouched corners create a more convincing fuller look.
Finding Favourites brings together affordable beauty dupes across makeup, skincare and fragrance. Browse by category or brand to compare budget-friendly alternatives, and sign up for the newsletter for new dupes and discount codes.