
How to Apply Highlighter: 5 Drugstore Dupes That Glow
Your highlighter looks softly luminous in the bathroom mirror, then turns into a hard stripe under office lighting. The habit that prevents it is simple: check where light hits your face before adding more product.
This post may contain affiliate links, which means I may receive a commission if you purchase through my links, at no extra cost to you. Please read the disclosure policy for more information.
How to Apply Highlighter Step by Step
Highlighter is a light-control step, not a layer of shine for the whole face. The Perfect Corp facial highlighting guide recommends targeting natural light-catching points and building gradually rather than spreading shimmer across the complexion.
Prepare, Locate, Then Apply
Finish the base first. Apply foundation, concealer, contour, and blush before targeted highlighter. Leave setting powder until after cream or liquid highlighter; powder highlighter goes over a lightly set base. This prevents you from covering the glow or dragging wet complexion products through it.
Find your light-catching planes. Turn your head slowly under the lighting you'll wear your makeup in. Notice which parts of your cheekbones brighten naturally, rather than copying someone else's placement. Before loading your tool, choose a texture from the formula table under “Choosing a Highlighter Formula and Shade.”
Load less than you think you need. For powder, touch a medium fluffy brush or fan brush lightly to the surface, then tap off excess. For cream or liquid, use a fingertip or damp sponge; warm cream on the back of your hand first. Start with a pinhead-sized dab of concentrated liquid, not a full applicator swipe, because it's easier to add than remove.
The difference between flattering glow and a visible stripe becomes clearer when you compare lighting.
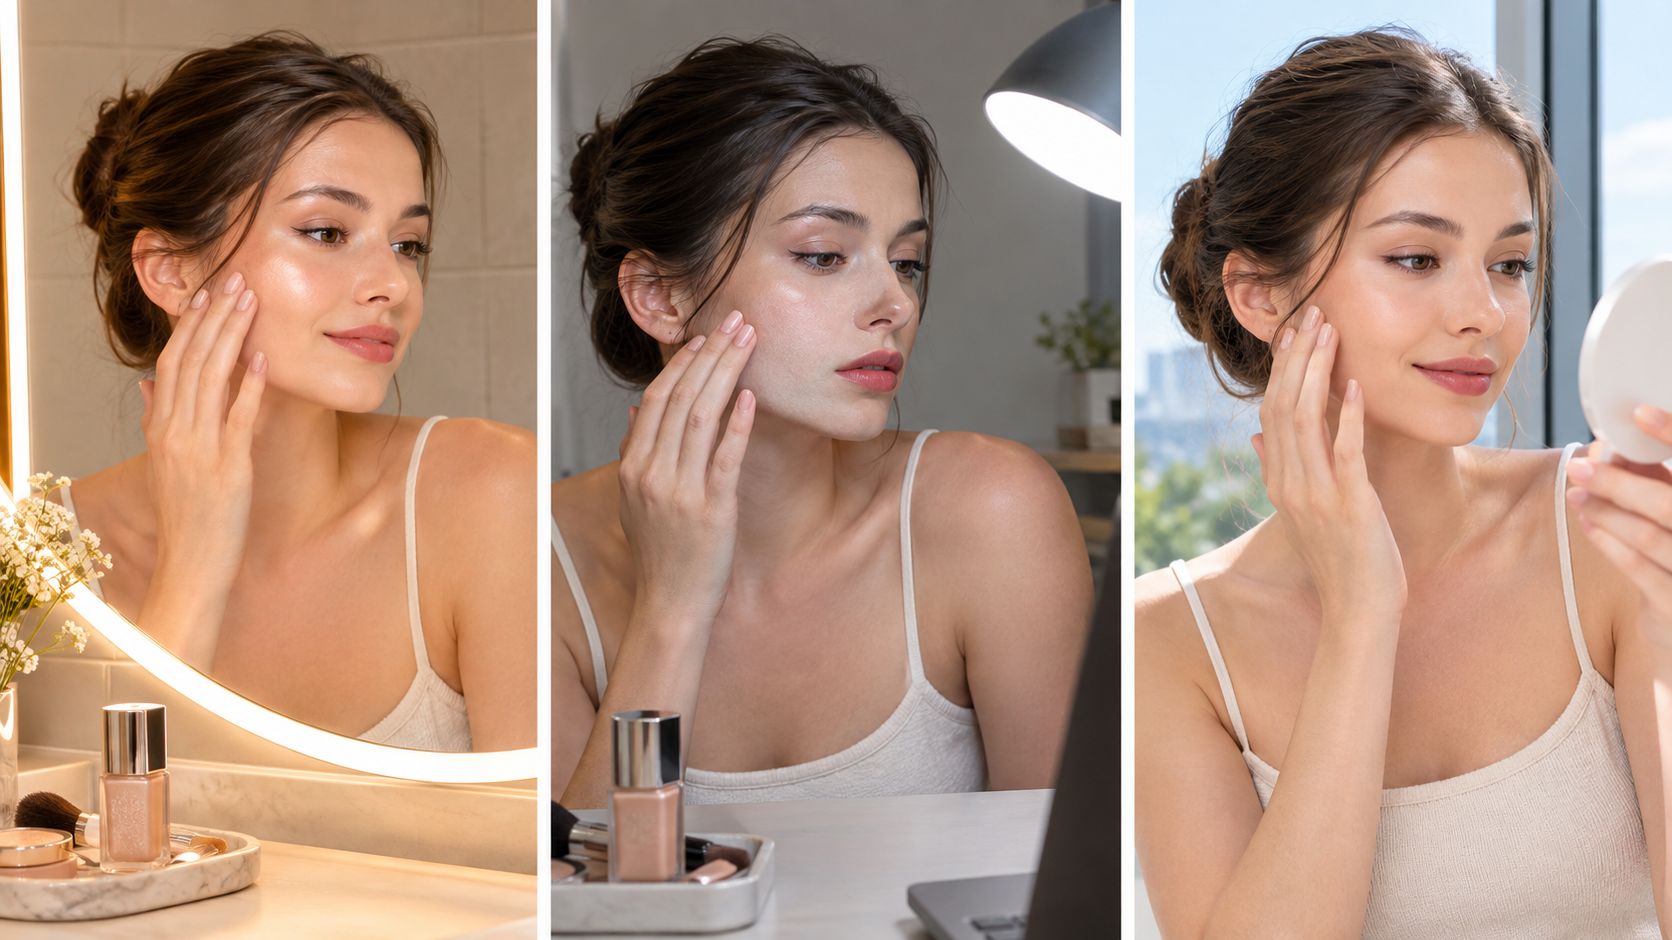
Place and Blend With a Light Hand
Start above the cheek apple. Tap onto the cheekbone top, then blend outward toward the temple in a soft C-shaped path. Brow bones, a narrow section of the nose bridge, and the Cupid's bow are optional accents, not a checklist you must complete. Use only residue from your tool on these smaller areas.
Diffuse every edge. Keep cheek highlight above the main blush zone and away from the under-eye. Use a clean brush or the clean side of your sponge around the perimeter until you can't identify where the product starts. Blend the boundary rather than repeatedly rubbing the brightest point.
Check before building. Look in window daylight before adding another thin layer. If you want more definition, increase reflectivity at the cheekbone's highest point rather than widening the highlighted area.
At arm's length, the finished result should look like a change in light as you turn, not a pale mark that remains visible straight on. If the stripe is obvious when your face isn't catching light, soften it before continuing.
Where to Place Highlighter for Your Face Shape
Highlighter placement by face shape
| Face Shape | Primary Placement | Skip or Keep Light |
|---|---|---|
| Round | Cheekbone tops swept up and out toward the temples, plus a narrow bridge line | Full cheek width and the chin |
| Oval | Cheekbone tops and brow bones, with a light touch on the bridge | Under-eye and nose tip |
| Square | Upper cheek apples and the temple-side edge, softly blended | A hard horizontal stripe along the jaw |
| Heart | Cheekbones and a small amount at the chin center | Wide, high cheek stripes |
| Long or oblong | Slightly lower, short horizontal cheekbone placement, plus brow bones | A long vertical nose stripe |
Treat this table as a starting point, not a corrective map. Allure's highlighter application guide emphasizes finding your own light-catching planes, keeping cheek placement controlled, and avoiding reflective product beneath the eyes.
Adjust the Direction, Not Just the Amount
On a round face, a thin, partial bridge highlight can create a lengthening impression without covering the cheeks in shimmer. Keep the cheek placement lifted toward the temples instead of carrying it across the full cheek width.
For a square face, place a soft sheen on the upper curve of the cheek apple and diffuse toward the temple. Don't trace the jaw with reflective powder: that emphasizes its edge rather than softening the overall impression. Coordinate the color placement with our guide to applying blush correctly so the blush and highlight don't become competing stripes.
On a long or oblong face, keep the cheek highlight short and slightly lower, while still sitting on the cheekbone. A restrained horizontal accent can interrupt a strongly vertical impression; a long sweep toward the brow can reinforce it. A horizontal stripe does not automatically lengthen a face, but a heavy stripe looks artificial regardless of face shape.
Check Where Attention Lands
Take a flash photo and a window-daylight photo with your face at a similar angle. Compare the brightest areas, not just how sparkly the product looks.
The under-eye and nose tip are common places where shine pulls attention toward something you weren't trying to emphasize.
Placement rule: If the highlight draws your eye to the wrong area, narrow it or move it slightly lower while keeping it on the cheekbone.
Choosing a Highlighter Formula and Shade
Highlighter formulas compared
| Formula | Finish | Best Placement | Tool |
|---|---|---|---|
| Powder | Soft satin to frosted; easily diffused | Cheekbone tops and brow bones | Medium fluffy or fan brush |
| Cream | Dewy, blended into skin | Cheekbones and a narrow bridge accent | Fingertip or sponge; warm cream first |
| Liquid | Sheer to intense; can streak when overloaded | Cheekbones and a thin Cupid's bow accent | Fingertip or damp sponge |
| Stick or balm | Satin to wet-looking | Small, targeted areas | Fingertip, tapped in |
Texture in the packaging doesn't tell you everything. Compare how the product spreads and whether individual shimmer particles remain obvious on skin.
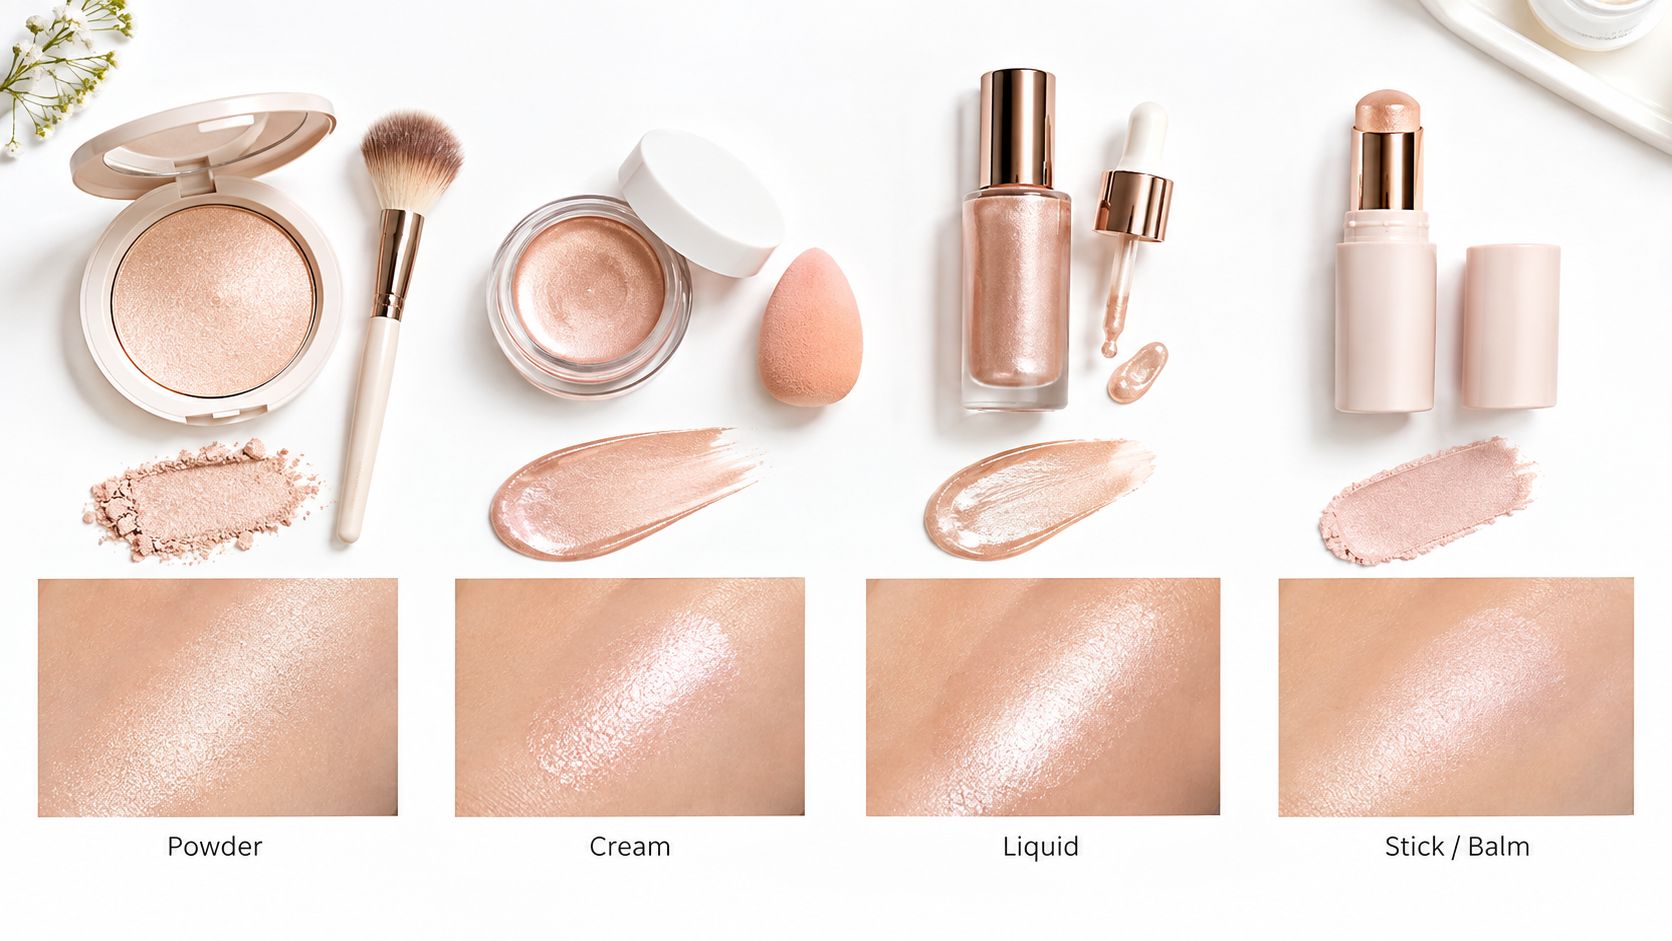
Reflective pigment matters as much as whether a product is liquid or powder. A cosmetic-material evaluation published through the Society of Cosmetic Chemists library found greater measured lightness increases and chroma reductions with titanium dioxide-coated mica or synthetic fluorphlogopite than with uncoated natural mica. That doesn't rank finished highlighters, but it explains why some formulas brighten sharply even in a thin layer.
Keep intense reflectors on the highest planes. A softer pearl is more forgiving across a slightly wider area.
Match Depth Before Chasing Sparkle
- Fair, cool skin: Pink pearl or icy champagne can complement cool undertones, provided the shade doesn't leave a white stripe.
- Warm or golden undertones: Gold and peach usually integrate more naturally than a strongly silver reflection.
- Deeper skin: Rich gold, bronze, copper, or rose can provide luminosity without excessive pale contrast.
Clarins' highlighter guidance highlights the importance of shade depth and lighting, including how overly pale shades can look stark or gray on deeper complexions. If undertone is the confusing part, use our guide to what undertone means in makeup.
For an application demonstration, watch the placement and blending rather than trying to reproduce the exact amount.
Swatch along the jawline to assess contrast in daylight and indoor light, then wear the product before deciding. Choose satin for ordinary office lighting, a stronger reflection for evening, and tightly controlled placement for flash photography.
Blending, Layering and Fixing Common Mistakes
Blend outward with a clean brush rather than grinding the product into your foundation. With powder, press lightly and sweep the perimeter; repeated buffing can lift the base and spread shimmer beyond the intended area.
For extra wear, apply cream before setting powder, then tap a compatible, similarly toned powder highlighter over the brightest point. More layers can increase reflectivity, but they also increase the chance of texture and base disruption.
Make the Base Work With the Finish
Prepare dry or mature skin with moisturizer and, if needed, a hydrating primer before foundation. Set only where necessary rather than coating dry cheeks in powder and trying to restore freshness with shimmer.
On oily skin, use less highlighter and favor a controlled powder finish. Blot surface oil before touching up; otherwise, you're adding reflective pigment to an already reflective surface. Our guide to applying setting spray explains the finishing step without relying on extra powder everywhere.
For textured, mature, or acne-prone skin, start with satin or fine pearl rather than metallic or wet balm. Place the glow beside prominent pores or raised blemishes, not directly over them, and press product into position rather than sweeping across the area. Allure's highlighter selection guidance supports a hydrated base for mature skin and more targeted powder application for oily skin.
Highlighter finish by skin texture
| Finish | Best For | Avoid On |
|---|---|---|
| Satin | Mature or textured skin in daylight | Heavy layers over pores and lines |
| Pearl | Oily skin that needs controlled reflection | Flaky dry patches |
| Metallic | Smooth skin for evening wear | Prominent pores, texture, and blemishes |
| Balm or wet-look | Smooth, well-hydrated skin | Pores, lines, and raised blemishes |
Fix the Problem Before Adding More
- Over-application on texture: Press with a clean, barely damp sponge to lift excess. Don't scrub, which can remove concealer from blemishes.
- Shine on the nose tip or under-eye: Blot locally, then tap a little matching complexion powder over the reflection. Avoid spreading the correction across the entire cheek.
- A sharp edge: Use an unloaded brush around the border. Adding more highlighter to blend it usually makes the stripe wider.
- Metallic overload: Veil the area with a small amount of translucent or skin-toned powder. Check that translucent powder doesn't leave a pale cast on your complexion.
- A patchy spot: Lift the loose excess first, then soften with neutral powder. If foundation has lifted, repair that small patch before considering more highlight.
When the area starts looking wet in daylight, stop adding product. If the result is already too reflective, waiting for it to settle won't reliably make the placement narrower.
A lighter hand almost always looks better than an unnecessary second layer.
5 Drugstore Highlighter Dupes Worth Buying
Price rarely decides how a highlight reads on a real face. Placement, pressure and the light you test it under do, so each pick below is judged on the finish it reflects rather than how closely its packaging echoes the original. All five are usable buys, with honest limits on where each one falls short of the pricier match.
| Dupe | Pricier Match | Best For |
|---|---|---|
| e.l.f. Halo Glow Liquid Filter | Becca Shimmering Skin Perfector Liquid | Sheer, blendable glow on normal to dry skin |
| Wet n Wild MegaGlo Highlighting Powder | Hourglass Ambient Lighting Powder | Targeted shimmer on normal to oily skin |
| Milani Strobe Light Highlighter | NARS Light Reflecting Prismatic Powder | Soft-focus sheen on normal skin |
| NYX Born to Glow Liquid Illuminator | Fenty Beauty Killawatt Highlighter | Stronger evening shine on normal to dry skin |
| Maybelline New York Facestudio Master Strobing Stick | Glossier stick highlighter | Stick-format touch-ups on normal to dry skin |
Compare the Reflection, Not the Packaging
e.l.f. Halo Glow Liquid Filter
The strongest starting point for a sheer, blendable glow, particularly on normal to dry skin. Its resemblance to Becca Shimmering Skin Perfector Liquid sits in the general luminous effect rather than identical pigment or wear. Tap a small amount onto the cheekbone instead of working an all-over layer when flash shine is a concern. If I had to pick one for a kit, this earns it.Wet n Wild MegaGlo Highlighting Powder
A practical targeted powder for normal to oily skin. Where Hourglass Ambient Lighting Powder gives a diffuse finishing effect, this one reads as more defined shimmer, so keep it on the outer cheekbone with a fluffy brush. Shimmer that looks soft in daylight can turn into a much brighter reflection under flash.Milani Strobe Light Highlighter
The closest match here to NARS Light Reflecting Prismatic Powder's soft-focus sheen on normal skin. Apply a thin layer to the outer cheek and build slowly. A powder this reflective shows texture quickly if you load the brush.NYX Born to Glow Liquid Illuminator
A stronger, wetter shine than Fenty Beauty's Killawatt powder, so treat it as an evening liquid rather than a daylight finishing step. Keep it concentrated on the crest of the cheekbone on normal to dry skin, and blend the edges before it sets.Maybelline New York Facestudio Master Strobing Stick
The Glossier comparison holds on format and ease of use more than on finish, since this stick lays down a bolder stripe of light. For touch-ups on normal to dry skin, transfer product to a finger first so the bullet doesn't drag your base.
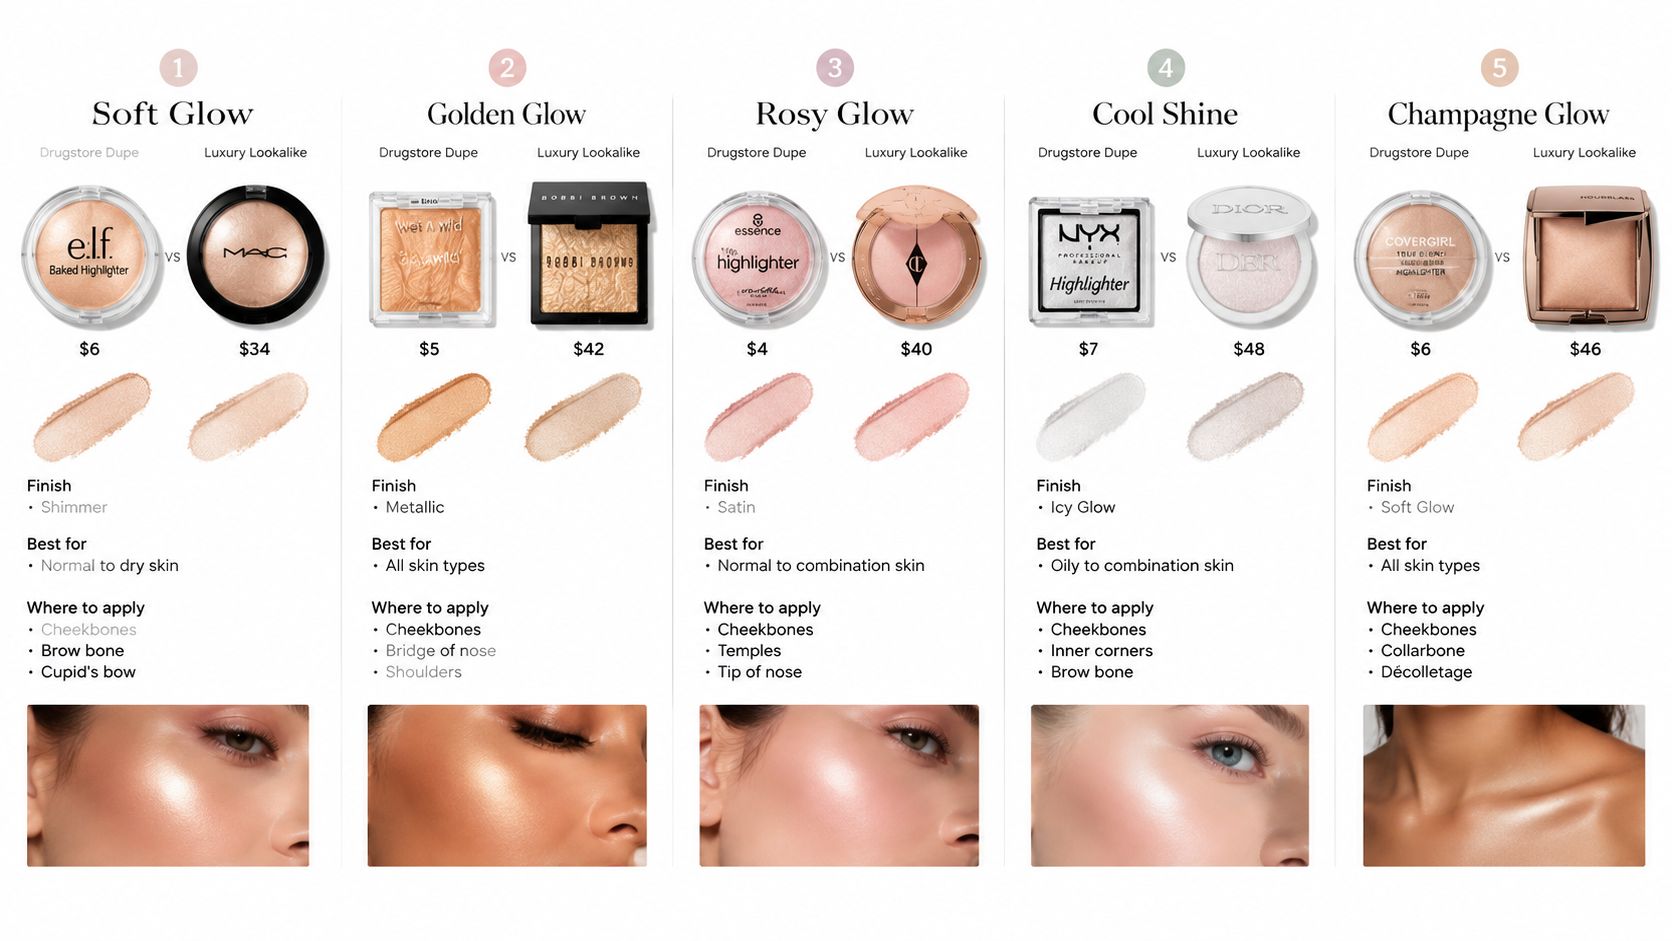
A cheaper formula can match a pricier one on finish without matching it on longevity. Check how each of these wears over a few hours under the light you'll be seen in, because a glow that stays even through the afternoon did its job regardless of the price tag.
Frequently Asked Questions About Applying Highlighter
Does Highlighter Go Over or Under Foundation?
For targeted highlighting, apply it over foundation, concealer, and blush. Cream belongs before setting powder; powder highlighter goes over a lightly set base, with a same-tone powder accent over cream if you want a stronger finish.
How Do I Fix a Patchy Highlighter Spot?
Blot excess without rubbing, then lightly press translucent or neutral powder over the reflection. If the base underneath has lifted, repair it locally rather than covering the patch with more shimmer.
Can Deeper Skin Wear Highlighter Without an Ashy Look?
Yes. Try richer gold, bronze, copper, or rose instead of automatically choosing icy champagne, and inspect a jawline swatch in daylight for a gray or pale cast.
Will a Budget Dupe Look Identical to the Pricier Match?
No. A useful dupe approximates a finish, not necessarily the texture, shade range, or wear of the original, and some popular comparisons aren't close enough to recommend. Compare the reflection in daylight and flash, then check whether the product remains even as you wear it.
Pick One Dupe and Test It in Daylight
e.l.f. Halo Glow Liquid Filter is the best overall starting pick here for a sheer, blendable liquid glow, especially if you liked the everyday luminosity associated with Becca Shimmering Skin Perfector Liquid. It's a finish alternative, not a promise of identical wear.
Follow the application order, keep placement on your own light-catching planes, and choose shade and texture for your undertone, skin depth, and usual lighting. For oily or textured areas, reduce the amount before reaching for another layer.
Choose a formula, apply it with a light hand, and check it in daylight and a flash photo before buying another product. Give yourself a week to learn how it behaves. A well-placed glow is more useful than a drawer full of almost-right highlighters.
Finding Favourites offers affordable beauty alternatives with attention to texture, finish, shade matching, and wear. Visit Finding Favourites for makeup dupe roundups and practical application guides that help you choose a budget swap for the result you want.