
How to Apply Eyeshadow for Beginners: 7 Pro-Level Dupes
You open a new palette, look at all those pretty shades, and suddenly every tutorial you've ever watched leaves your brain. Which color goes where? Why does everyone else make it look easy? If that's you, you're in the right place. Eyeshadow gets much less intimidating once you stop treating it like art class and start treating it like placement, pressure, and a few repeatable steps.
This post may contain affiliate links, which means I may receive a commission if you purchase through my links, at no extra cost to you. Please read the disclosure policy for more information.
If your eye makeup tends to fade by lunch, this guide pairs nicely with these makeup longevity tips. We're going to keep this simple, budget-friendly, and beginner-safe, including affordable palette dupes that give you that polished high-end look without the high-end bill.
Your Guide to Flawless Eyeshadow
Learning how to apply eyeshadow for beginners gets easier when you know what each step is doing. That's the part a lot of tutorials skip. They show a brush moving around the eye, but they don't explain why one shade goes in the crease and another sits on the lid.
The short version is this. We're creating shape, depth, and light. A softer shade helps map the eye. A lid shade adds the main color. A deeper tone gives definition. Blending makes everything look intentional instead of striped.
Big sister rule: You do not need perfect symmetry, expensive brushes, or a giant palette to get a pretty result.
You also don't need to copy dramatic social media looks right away. A clean, softly blended neutral eye teaches you the skills that make every future look easier, whether you want a quick everyday wash of color or something more dressed up.
Gather Your Beginner Eyeshadow Toolkit
Before shadow touches your lids, let's set you up with tools that make the process forgiving instead of frustrating.
The few things you actually need
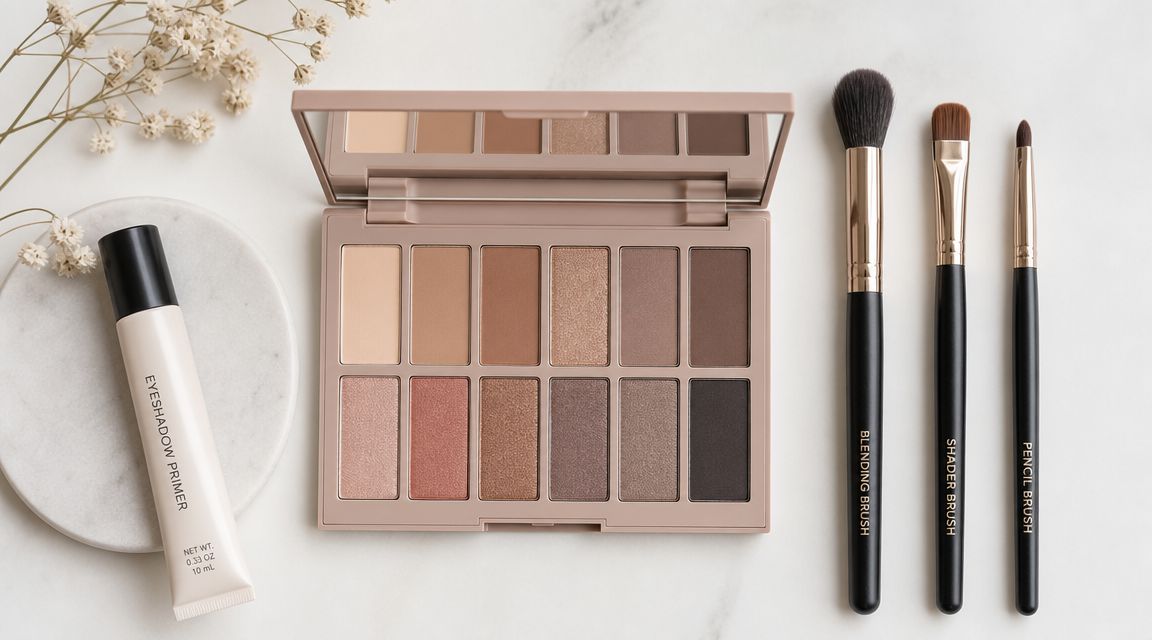
You don't need a giant brush set. Start with these:
Eyeshadow primer
This is the quiet hero. A beginner guide recommends using about a grain-of-rice amount of primer for both eyes, and notes that a thin layer helps create a smoother surface and reduce creasing, which is especially helpful while you're learning brush control and placement, according to Pivot Point Academy's beginner eyeshadow guide.A fluffy blending brush
This is your softening brush. It diffuses edges so your eye look fades nicely instead of stopping abruptly.A flat shader brush
This one presses color onto the lid. If your shadow disappears or looks weak, it's often because you're sweeping when you should be packing.A small detail or pencil brush
Great for the outer corner, inner corner, or smudging along the lash line.A beginner-friendly palette
Look for mattes and a couple of shimmers in neutral tones. If you want ideas, these drugstore eyeshadow palettes are a useful place to compare options.
Why these tools matter
Primer gives shadow something to hold onto. The fluffy brush softens. The flat brush builds impact. The small brush keeps deeper shades from taking over the whole eye. Each tool has a job, and once you stop using one brush for everything, your blending gets easier fast.
A lot of beginners get stuck because they buy colors before they buy control. The toolkit matters more than owning lots of shades.
A small amount of the right product usually looks better than a lot of product applied with the wrong brush.
What your palette should include
A beginner palette is easiest to use when it gives you a clear path:
- A light base shade for the lid or brow bone
- A mid-tone matte for the crease
- A deeper matte for the outer corner
- A soft shimmer for the center lid or inner corner
That little family of shades lets you practice placement without getting overwhelmed.
The 5-Step Foolproof Application Method
The easiest way to make eyeshadow look polished is to build it in layers. Not all at once. Layering gives you room to correct, soften, and stop before things go muddy.
A beginner-safe workflow recommends using primer first, then placing a matte transition shade in the crease to map the eye shape, packing a base shade on the mobile lid, deepening the outer corner or outer crease, and finishing with a light shimmer on the inner corner for dimension, as outlined in Maybelline's beginner eyeshadow tutorial.
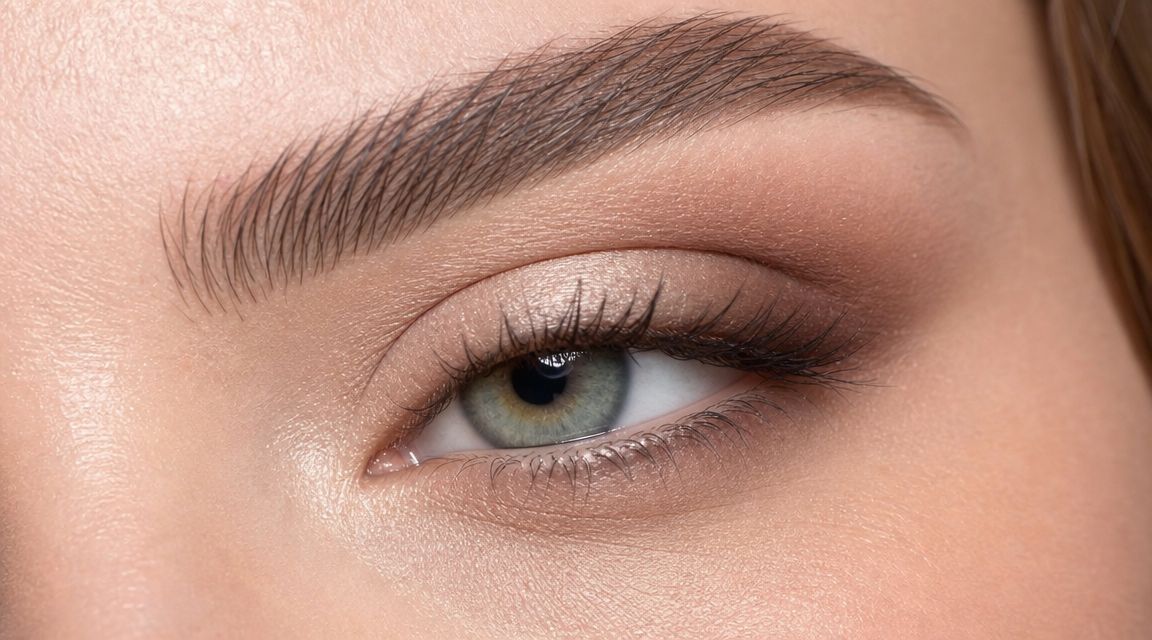
Here's the visual version first.

Prep the lid
Start on dry, clean lids. Apply a thin layer of primer and let it settle for a moment. This helps shadow go on more evenly and keeps the surface from grabbing pigment in random spots.
If you've ever had one eye look smooth and the other look patchy, prep is usually the reason.
Map the crease first
Take a matte shade that looks softly deeper than your skin and place it in the crease with a fluffy brush. Use small windshield-wiper motions or tiny circles. This shade isn't there to be dramatic. It's there to show your eye where the rest of the look will sit.
It's like sketching before painting. Once that shape is there, every other step makes more sense.
Placement shortcut: When you're unsure where to put depth, start lighter and keep it in the crease and outer corner first.
Pack color onto the lid
Now use your flat brush to press your main lid shade onto the mobile lid. Pressing gives you more payoff than sweeping. If you're using shimmer, beginners often find this step yields the most satisfying result because it instantly makes the eye look more awake.
Don't drag the lid shade too far into the crease. If it climbs too high, your eye shape can lose definition.
A quick demo can help if you like seeing the motions in real time:
Add depth to the outer corner
Take the deeper matte shade and place it on the outer corner of the eye. Keep it small at first. This shade is what gives the eye that lifted, dimensional look. If you put dark color everywhere, the whole eye can look heavy. If you keep it concentrated on the outer section, it looks intentional and flattering.
A smaller brush is helpful. It keeps the shape tight.
Blend and brighten
Go back with your fluffy brush and soften the border where shades meet. You're not trying to erase the colors. You're just blurring the edges so they melt into each other.
Finish with a lighter shimmer or light shadow on the inner corner. That small pop catches light and makes the whole look feel fresher.
A simple practice look
If you want one easy routine to repeat until your hands remember it, use this:
- Crease shade with a fluffy brush
- Lid shade pressed on with a flat brush
- Outer corner shade with a small brush
- Blend edges with the fluffy brush
- Inner corner highlight to finish
That's it. Repeat that same pattern with different colors and you'll start understanding eyeshadow much faster.
Quick Adjustments for Your Eye Shape
Eyeshadow starts making more sense when you work with your eye shape instead of forcing every tutorial to fit your face. Many guides organize beginner application around eye anatomy, and one recommends a matte contour shade that is 2–3 shades darker than your skin tone for crease depth because that controlled contrast is easier to blend than a much darker shade, according to Jane Iredale's eyeshadow application guide.
Hooded eyes
If your lid space seems to disappear when your eyes are open, place your crease shade slightly above your natural fold so you can still see the color. Keep the deepest shade on the outer portion only.
Monolids
Create your own shape with gradient placement instead of chasing a visible crease that isn't naturally pronounced. Keep the darkest color close to the lash line and softly diffuse upward.
Downturned eyes
Focus depth on the outer corner, but blend it outward and slightly upward instead of down. This can help the eye look more lifted.
Round eyes
If you want more elongation, keep the inner half lighter and concentrate medium and deeper shades on the outer half. That shifts attention outward.
Your eye shape isn't a problem to fix. It's just the map that tells you where shadow will show up best.
Common Beginner Mistakes and Easy Fixes
Most eyeshadow problems aren't talent problems. They're pressure, placement, or product-load problems.
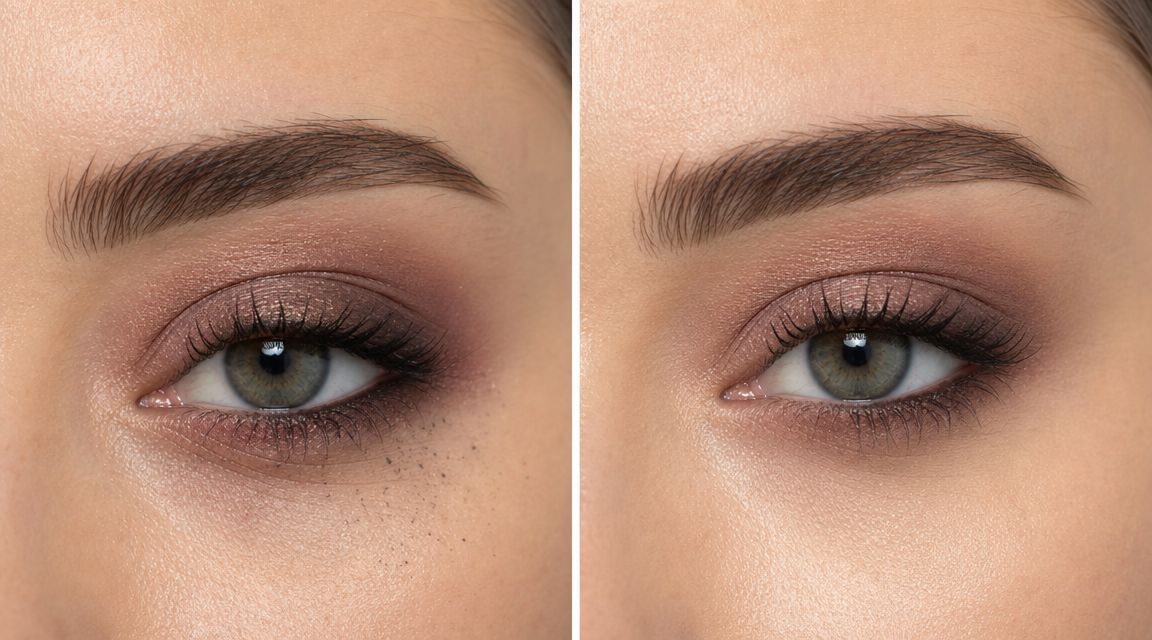
A common set of errors for beginners includes applying too much product, blending too high into the brow area, and using the wrong brush pressure. A tutorial on these mistakes advises tapping off excess pigment before applying shadow and using lighter pressure for blending than for packing color, in this beginner eyeshadow technique video.
If your shadow looks muddy
You're probably using too much product or layering deep shades too quickly.
Start with less than you think you need. You can always add more. Taking away is harder.
If the color creeps up toward the brow
Your blending zone is too big. Keep most of your motion where you want the color to live. Blend the edge, not the whole upper eye area.
If your eye look seems patchy
Try pressing color on first, then blending only the edges. Also check whether your brush is overloaded. Too much powder can skip and cling in uneven spots.
If everything vanishes after blending
That usually means you blended with the same strength you used to place color. Pack with more intention, then switch to a lighter hand when softening.
A lot of us think the answer is “blend more.” Sometimes the answer is “use less product and less pressure.”
7 Beginner Palettes That Look Expensive
If you've watched luxury palette tutorials and thought, “Of course it looks good, that palette costs a fortune,” I have good news. You can get a very similar vibe with affordable palettes that are easy to find in the US.
Luxury eyeshadow palette dupes at a glance
| Luxury Palette | Best Dupe | Approx. Savings |
|---|---|---|
| Urban Decay Naked3 | e.l.f. The New Classics Eyeshadow Palette | Usually lower priced than the luxury option |
| Huda Beauty Nude Obsessions Light | ColourPop Nude Mood | Usually lower priced than the luxury option |
| Anastasia Beverly Hills Soft Glam | Makeup Revolution Re-Loaded Velvet Rose | Usually lower priced than the luxury option |
| Natasha Denona Bronze Palette | Juvia's Place The Warrior II or a warm neutral ColourPop option | Usually lower priced than the luxury option |
| Too Faced Natural Eyes | e.l.f. Bite-Size Eyeshadow in neutral color stories | Usually lower priced than the luxury option |
| Charlotte Tilbury Pillow Talk palette family | ColourPop Blush Crush | Usually lower priced than the luxury option |
| Tartelette in Bloom | Milani Gilded Mini or soft neutral e.l.f. palette options | Usually lower priced than the luxury option |
If you like comparing affordable swaps across categories, Finding Favourites also has a broader roundup of affordable makeup dupes.
1. Makeup Revolution Re-Loaded Velvet Rose
This is my pick for the most beginner-friendly luxury look on a budget. The color story gives you soft mattes, deeper outer-corner shades, and enough shimmer to dress things up without getting complicated. If you like the feel of Anastasia Beverly Hills Soft Glam, this gives a similar neutral-to-rosy versatility.
Why it works for beginners: the shades make sense together. You're less likely to create a muddy look when the palette already stays in one family.
2. ColourPop Nude Mood
If you want warm neutrals with cozy browns and wearable shimmer, this is such a solid buy. It gives the soft glam energy people often want from pricier nude palettes.
It's especially nice if you're practicing everyday looks because none of the shades feel too risky. You can do a one-shadow wash or a full crease-lid-outer-corner combo.
3. e.l.f. The New Classics Eyeshadow Palette
This one is great if you want options without spending luxury money. It has enough variety to learn with, but the tones still feel wearable. If you've admired larger high-end neutral palettes, this scratches that itch in a much more accessible way.
A palette like this helps you experiment with cool, warm, matte, and shimmer finishes while still staying in beginner territory.
4. ColourPop Blush Crush
If your dream eye look is soft pinky neutral rather than classic brown neutral, this is a lovely option. It gives that romantic rose-toned effect many people chase in luxury palettes.
This is a good one if regular browns feel harsh on you. Rosier neutrals can look gentler while still giving shape.
5. e.l.f. Bite-Size Eyeshadow quads
These little quads are ideal if a full palette feels overwhelming. You get a curated mini color story, which makes application simpler because the decision-making is mostly done for you.
The biggest beginner perk is focus. Fewer shades mean fewer chances to overcomplicate the look.
6. Milani Gilded Mini in neutral color stories
Milani's smaller neutral palettes are easy to travel with and easy to understand. They usually combine a few practical mattes with a shimmer or two, which is exactly what most beginners need.
If you want something compact that still feels polished, this is a smart pick.
7. Juvia's Place neutral-toned palette options
Juvia's Place is great when you want rich payoff, but I'd suggest choosing one of their more neutral stories first rather than jumping into bright color. Used with a light hand, these palettes can create beautiful beginner looks with strong definition.
For someone who already feels comfortable tapping off extra pigment and building slowly, this can be a fun next step.
Budget tip: A smaller, well-chosen neutral palette is often more useful than a huge palette full of shades you won't touch.
Eyeshadow FAQs and Final Thoughts
FAQ
Can I apply eyeshadow with my fingers?
Yes, especially for shimmer on the lid. Fingers can press sparkle on beautifully. For crease work and blending, brushes still make life easier.
How do I make eyeshadow last all day?
Use primer first, keep the layers thin, and finish the rest of your makeup as usual. If you already use setting spray in your routine, that can help your full makeup look feel more locked in.
How do I turn a daytime eye look into a night look?
Keep your base look simple, then add a deeper shade to the outer corner and along the lash line. You can also press a shimmer onto the center lid for extra dimension.
The biggest lesson with how to apply eyeshadow for beginners is that eyeshadow isn't random. Once you understand why the crease gets a soft matte, why the lid gets the main color, and why the outer corner gets the depth, the whole thing becomes much easier to repeat.
If I had to name one best overall dupe from this list, it would be Makeup Revolution Re-Loaded Velvet Rose. It's versatile, beginner-friendly, and gives that expensive soft glam feel without asking you to spend like a luxury shopper. Start with a few brushes, a simple palette, and a light hand. You'll be surprised how quickly your blending improves.
If you love beauty finds that give you the same vibe for less, browse Finding Favourites for more practical dupe roundups, budget-friendly picks, and easy makeup guides that help you shop smarter.