How to Apply Winged Eyeliner That Lasts All Day
To apply winged eyeliner, keep your eye open, map a small flick outward from the direction of your lower lash line, connect it back to the upper lash line, and fill the triangle in thin layers. The cat-eye's roots reach back more than 5,000 years, but the best wing for you isn't a copied template, it's the one shaped to your own eyes.
This post may contain affiliate links, which means I may receive a commission if you purchase through my links, at no extra cost to you. Please read the disclosure policy for more information.
Why the Classic Winged Liner Trick Usually Fails
The diagonal flick everyone copies isn't automatically flattering. A wing drawn at the same angle on every face can disappear into a hooded lid, exaggerate a downturned outer corner, or look mismatched because most eyes aren't perfectly symmetrical. Map first, then choose your liner. A precise pen can't rescue a shape that's aimed in the wrong direction.
A wing works by extending and defining the eye. That idea has deep roots: eye-emphasizing cosmetics were used in ancient Egypt from approximately 3100 BC to 332 BC, and related styles appeared among men and women in ancient Asia and the Middle East around 3000 BC. The look has changed, but the principle remains: follow the eye's outer structure and extend beyond the lash line with intention. The history of the cat-eye gives useful context for why this shape has endured.
Start with your eye, not the trend
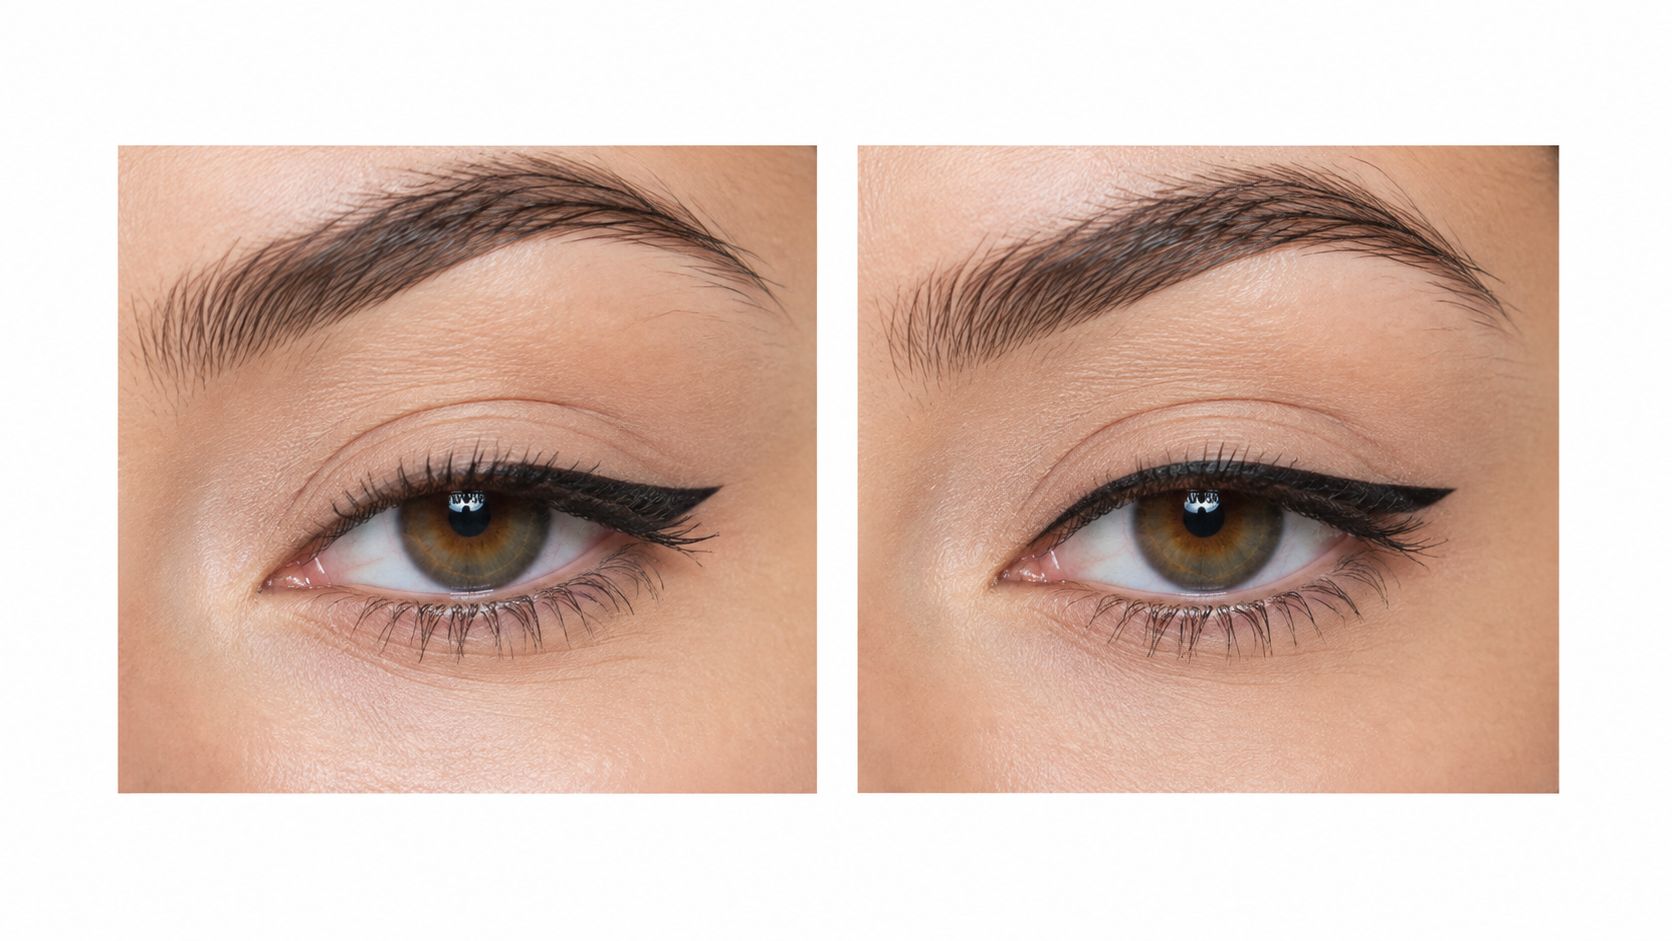
Look straight ahead into a mirror and notice where your lid folds, how the outer corner sits, and how much liner stays visible when your eyes are relaxed. That's your map. A wing should remain visible and look deliberate from this natural, open-eye position, not only when you tilt your head or stretch the skin.
The shape can be soft or graphic, but its job is to direct attention outward and frame the eye. A finer line through the inner portion and a little extra thickness near the outer corner often creates that effect without crowding the lid. For a more enduring makeup look beyond eyeliner, try these tips for making makeup last all day.
| Formula | Best For | Skill Level | Finish |
|---|---|---|---|
| Pencil | Soft, forgiving definition | Beginner-friendly | Smudged or natural |
| Gel | Controlled, buildable shape | Intermediate | Smooth and defined |
| Liquid | Crisp, dramatic wings | More practice helps | Sharp and high-impact |
| Felt-tip | Quick, precise application | Beginner to intermediate | Clean and graphic |
The four eye-shape adjustments that matter most are simple: keep the wing visible over hooded lids, lift rather than follow a downturned corner, lengthen round eyes with a finer flick, and map each side independently when your eyes are asymmetrical. Your budget matters, but your map matters more.
Prepping Your Lids and Mapping the Wing
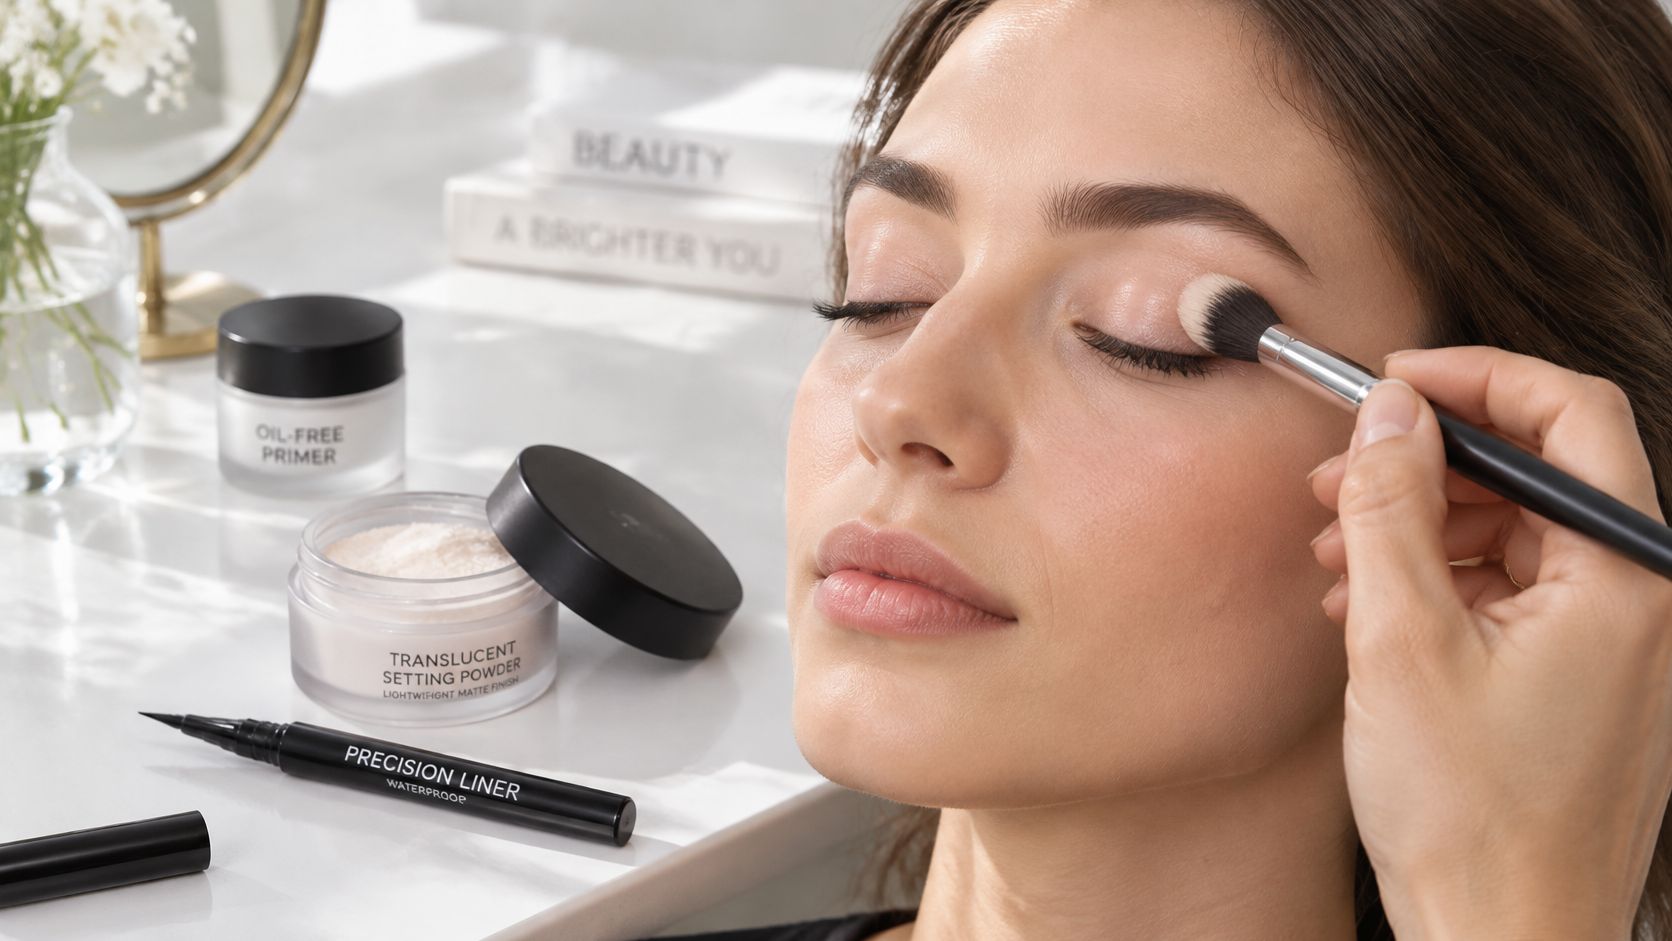
Skip the prep and your wing will slide off by lunch. Start with a clean, dry eyelid. Oily lids need a thin layer of eye primer left to set for a minute, plus a light dusting of translucent powder if you prefer a less tacky surface. This guide to applying eyeshadow primer walks through that base step in more detail.
Map with your eyes open
Sit upright, look straight into a mirror, and keep your face relaxed. Pulling the lid taut or drawing on a closed eye changes the skin's shape, so the line buckles or vanishes the moment you look normally again.
For a starting point, extend the direction of your lower lash line outward and slightly upward. Rae Morris's winged-liner mapping guide places a common flattering lift around 10–20 degrees, though your eye shape should decide the final angle, not a fixed measurement. Her method also treats the line running from the nose corner to the outer eye as the upper boundary for the wing, which keeps the flick from drifting too high.
Then build the shape in stages:
- Mark the endpoint while looking straight ahead. Keep it short at first; you can extend it later.
- Draw the lower edge from the outer corner toward that endpoint, following your chosen angle.
- Connect the tip back to the upper lash line, creating a small triangle.
- Fill the triangle gradually, then trace the upper lash line in short, thin strokes.
A gradual build gives you far more control than one sweeping line. Keep the inner lash line fine and add thickness toward the outer corner. Step back and check both eyes together at a normal viewing distance before deciding either wing needs work.
If the lower edge wobbles, tidy just that section with a pointed cotton swab and a drop of makeup remover. A small mistake never justifies wiping off the whole wing. The CVS step-by-step winged eyeliner guide recommends the same open-eye approach, particularly when a lid fold can hide the finished flick.
A visual demo makes it easier to see how short strokes connect into one clean line:
Pencil, Gel, Liquid, and Felt-Tip Compared
The right formula is the one you can control. Don't buy liquid liner just because a sharp black wing looks gorgeous online. If your hand is still learning the route, a softer formula gives you room to adjust; once the shape feels familiar, a more precise format can make the finish crisper.
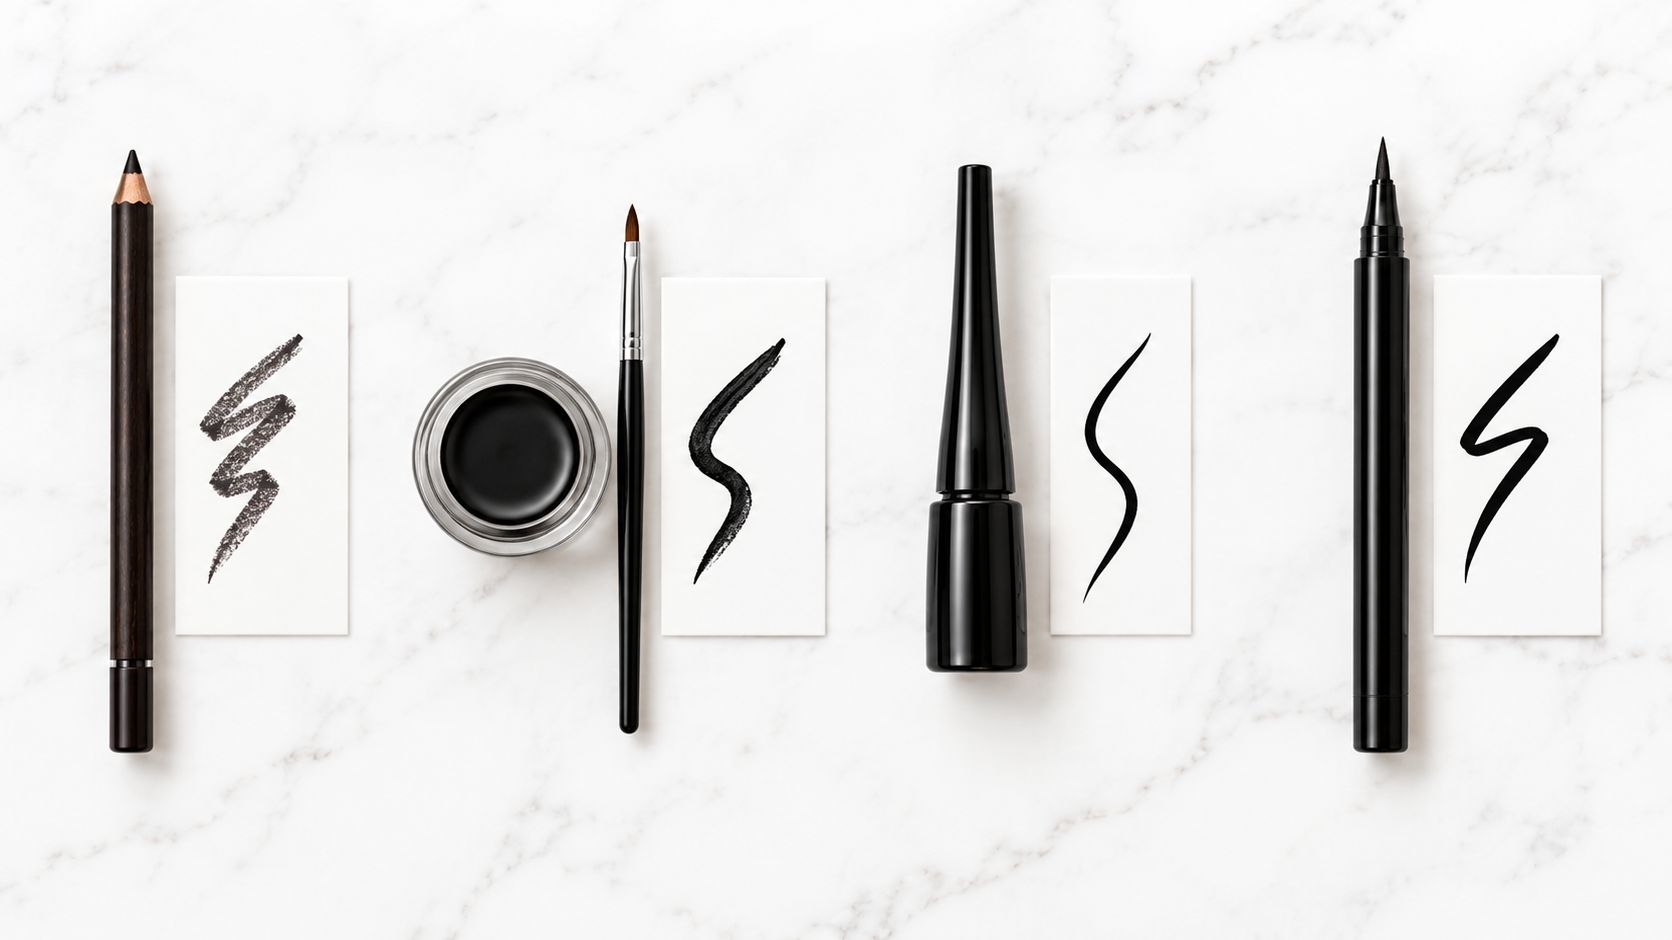
Pencil is the forgiving pick. Press short strokes along the upper lash line rather than dragging the pencil across the lid, then join them with a small brush. A pencil can make a soft, lived-in wing, though it may not produce the cleanest point. Keep it sharpened for better control.
Gel gives you a useful middle ground between softness and definition. Pick up a small amount with a thin angled brush, wipe away excess, and sketch the wing in controlled strokes. Clean the brush regularly so product doesn't stiffen the bristles and blur the line you're trying to create.
My rule: A liner that gives you control is better than one that promises drama you can't comfortably apply.
Liquid is the choice for an inky, crisp finish, but it's less forgiving of pauses and wobbles. Rest your elbow on a stable surface and keep your hand anchored; draw the wing as connected small strokes, not a single heroic swipe. If the product needs dipping, cap it between applications so it doesn't dry out while you work.
Felt-tip pens offer a more direct grip than a brush-and-pot setup. They're convenient when you want to draw a defined line without loading a separate tool, although a very firm tip may feel less flexible on textured or hooded lids. Use its point to map the edge, then fill the wing in carefully rather than pressing hard.
For a beginner, pencil or a flexible felt-tip is a sensible place to start. For a softer wing, choose pencil or gel. For the sharpest graphic result, choose liquid only if you can work slowly and correct small sections without rushing.
Adapting the Wing to Your Eye Shape
Your eye shape is the information that places the wing. Forget the diagonal-flick template every other guide hands you and work with what your lid shows. Keep your eyes open, look straight ahead, and mark the endpoint where the flick stays visible. Connect that point back to the upper lash line. If one side needs a different endpoint or length to look balanced, adjust it. Matching measurements matter far less than matching results.
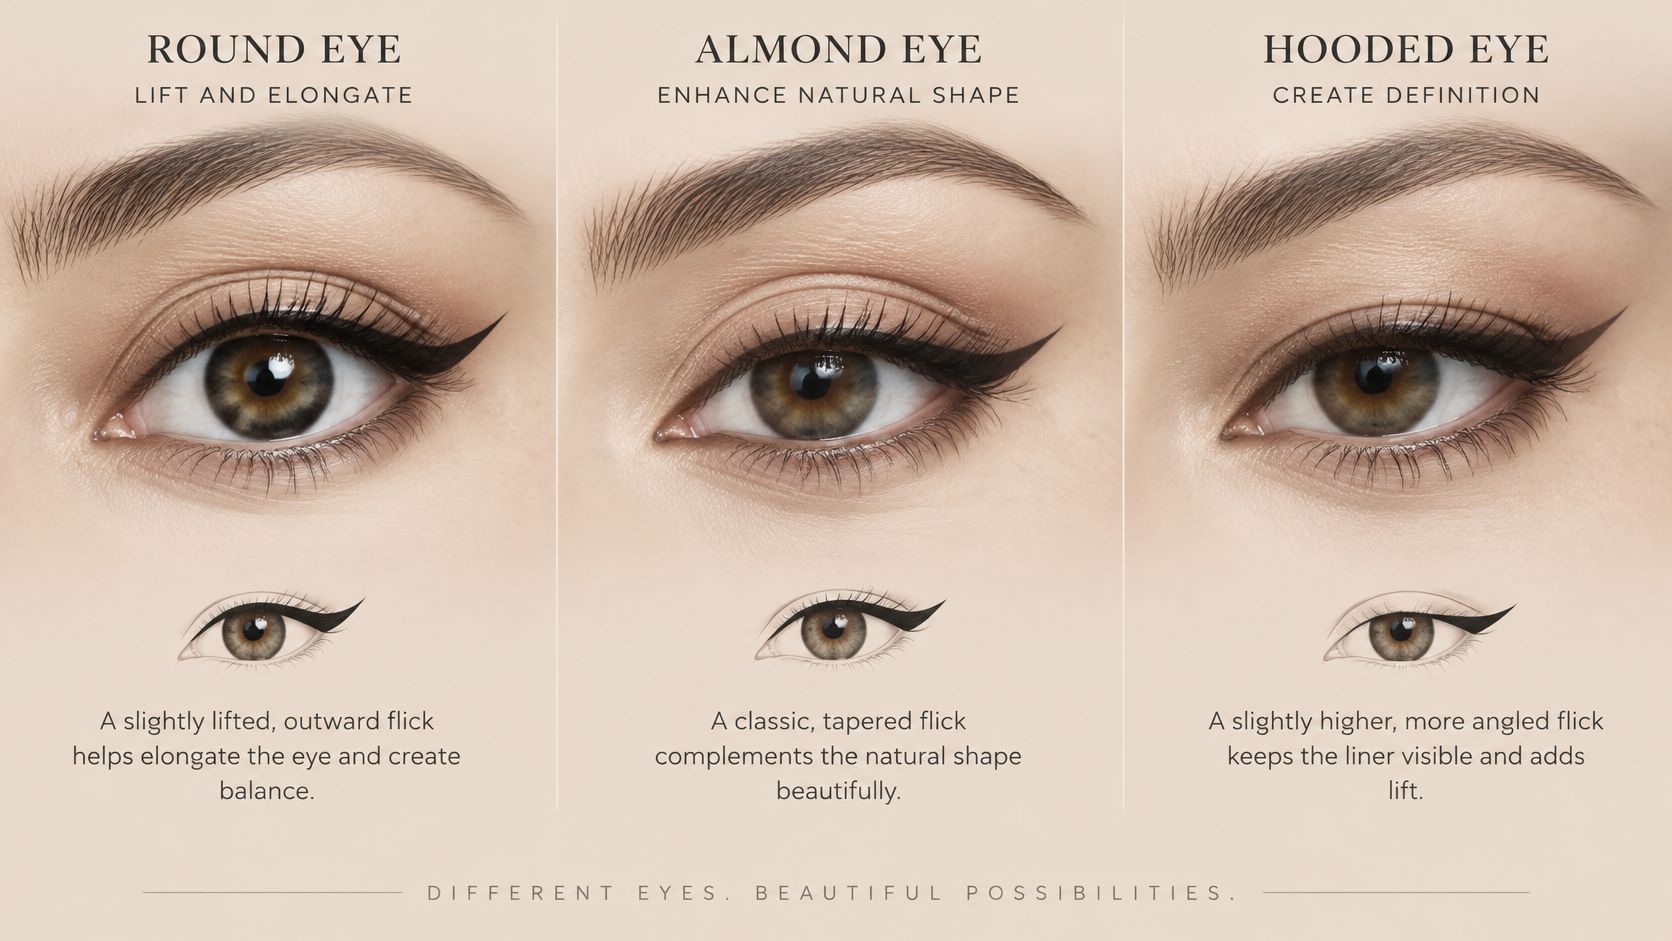
Let the open eye set the shape
Hooded eyes: If the crease hides the flick, extend the outer edge horizontally before connecting it back, creating a small “batwing” that stays visible with your eye open. This is the one shape where I'd tell you to skip the standard upward angle entirely.
Downturned eyes: Don't trace the downward slope of the outer corner and expect the result to lift it. Extend the guide slightly upward from the lower-lash direction, and stop before the natural corner pulls the line down. Keep the wing modest until you can see how it sits on your open eye.
Round eyes: Try a thinner, longer flick to emphasize outward length rather than adding a thick block at the corner. Keep the upper lash line close to the lashes and let the wing provide the extension.
Almond eyes: You can usually try a range of lengths and thicknesses. Start with a fine line close to the lashes, then build the outer section until the wing looks balanced with your visible lid.
Asymmetrical or mature eyes: Don't force identical endpoints. A fold, outer-corner angle, or amount of visible lid can differ from one side to the other, so map each eye separately and judge the pair together. A slightly different guide point can look more even than matching measurements exactly.
Make the technique work for your hands
Reduced vision or limited dexterity calls for shorter moves, not a different goal. Stamp the line in small connected sections instead of drawing continuously. A soft pencil followed by matching shadow buys you time to refine the outline, and a magnifying mirror helps when it's positioned securely away from the eye.
The most dramatic flick isn't automatically the most flattering one. A shorter, thinner wing often creates a more lifted effect because it follows your visible lid instead of overpowering it.
Common Mistakes and Quick Fixes
The “one stroke or start over” idea makes winged liner harder than it needs to be. A wing is a collection of small edges that meet. If one part slips, fix that part; you don't need to erase a line that's already working.
Fix the shape before adding more product
- One unbroken stroke: It can wobble before you reach the tip. Use short connected strokes along the lash line, then draw the outer edge separately.
- Mapping with your eye closed: The line may disappear when you open your eye. Remap while looking straight ahead and adjust the tip to the visible lid.
- Copying someone else's angle: A wing that suits another person can pull your eye down or vanish into your crease. Use your own lower-lash direction as a guide, then change the angle to suit the open eye.
- Pulling the lid: Tugging distorts the surface and makes it harder to predict where the line will sit. Rest your hand lightly against your cheek instead of stretching the skin.
- Overcorrecting a tiny wobble: Dab the edge with a cotton swab and remover. If the wing needs a cleaner underside, use a small amount of concealer on a brush rather than building a thick layer of liner.
Tape can help some people map a boundary, but don't press household tape against delicate eyelid skin. A removable cosmetic-safe stencil is a better option, or draw the guide with pencil or shadow first and clean it up afterward.
Eye safety is part of the technique. A 2025 peer-reviewed study recommends keeping daily eyeliner mainly on the outer lash line, because waterline application can obstruct meibomian-gland openings and worsen dry-eye symptoms. Build the wing above or outside the lash roots rather than rubbing product into the waterline. The study on eyeliner and ocular health supports taking that placement seriously.
Wash your hands, use clean applicators, and don't share eye makeup or tools. Choose products made specifically for the eye area; the FDA's eye-cosmetic safety guidance warns against using products such as lip liner near the eyes. Skip makeup if the eye or surrounding skin is infected or inflamed, don't apply it in a moving vehicle, and stop using it if irritation starts.
Best Budget-Friendly Winged Liner Dupes
A good budget swap should match the way you like to apply liner, not just the color on the package. I'd choose by format first, then decide how sharp or soft you want the finished wing. For more options, this drugstore eyeliner roundup compares affordable products for different liner looks.
| Dupe | Format | Best For |
|---|---|---|
| Creamy kohl pencil | Pencil | Soft, blendable wings |
| Long-wearing gel-pot alternative | Gel pot | Brush-controlled definition |
| Precision liner pen | Liquid pen | Crisp, narrow flicks |
| Travel-friendly felt-tip hybrid | Felt-tip | Quick, direct application |
Four affordable formats to look for
Creamy kohl pencil. Choose this if a hard pencil drags on your lid or you want a wing you can soften with a brush. A black or deep-brown shade is easy to work with, and pressing short marks along the lash line gives you more control than drawing one long stroke. It's a practical budget alternative to a softer luxury pencil, especially for a beginner who wants to adjust the edge before it sets.
Gel pot with an angled brush. This is the pick for people who like the precision of a brush but don't want the speed of a liquid pen. Look for a smooth black gel and a fine angled brush that keeps its point. The trade-off is that you need to manage both the pot and brush, so it's less convenient for rushed touch-ups. Best overall recommendation: this format offers the most control over wing thickness and shape, especially while you're learning to map both eyes.
Precision liquid pen. A fine-point pen suits a crisp, defined wing. Choose one that feels easy to grip, then use it to connect small strokes rather than drawing the whole line at once. This is less forgiving than pencil, so it's a better pick after your mapping feels consistent.
Felt-tip hybrid for travel. A felt-tip format is a straightforward choice when you don't want to carry a separate brush. It can work for a simple line and a modest flick, though you'll still need a steady hand for a sharply pointed finish. Keep the cap secured between uses to help protect the tip.
Specific products and prices can change, so check current U.S. retailer listings before buying rather than relying on an old price or assuming a formula is still available. Finding Favourites publishes beauty comparisons that help readers assess affordable alternatives by finish, texture, and wear.
Frequently asked questions
Should I draw the wing before or after eyeshadow?
Either order can work. If you're still practicing, map the wing with pencil or shadow first, then apply your sharper liner once you're happy with the placement. If you do eyeshadow afterward, keep the wing's lower edge visible and tidy it with a small brush.
How do I make both wings look even?
Map both endpoints while looking straight ahead before filling either wing. Compare the eyes together from a normal viewing distance, then adjust the wing that looks different. Your endpoints don't have to sit at identical measurements if slightly different placement makes the pair look more balanced.
What's the easiest formula for a beginner?
A soft pencil is a forgiving starting point because you can build its line in short strokes and soften the edge. A felt-tip pen can also work if you prefer a defined point, but use a light hand and draw gradually.
Can I put winged eyeliner on my waterline?
For daily wear, keep the liner on the outer lash line rather than rubbing it into the waterline, particularly if you're prone to dry eye. Stop using eye makeup if you notice irritation, and avoid sharing products or applicators.
The best all-around dupe format is a gel pot paired with a fine angled brush because it gives you control over the wing's thickness while you learn your eye shape. The secret to winged eyeliner that looks right and wears well is still the same: map with your eyes open, build the line in small strokes, and choose a formula you can handle comfortably. Finding Favourites helps beauty shoppers compare affordable makeup alternatives and practical beauty finds. Visit Finding Favourites to explore budget-conscious beauty roundups and find your next smart swap.