
7 Lip Liner Before and After Looks to Try
Can a pencil really change the way your lips look before and after makeup, or does it only add a darker border? The visible difference comes from placement, contrast, finish, and blending. The same product can make lips look fuller, correct an uneven outline, create dimension, sharpen a bold lipstick, or disappear into a soft-focus stain. Lip liner has moved from the crisp dark outline associated with the 1990s toward a more blurred, lived-in finish, with recent coverage describing blending with fingers or brushes and pairing liner with balms and glosses (The Globe and Mail).
This post may contain affiliate links, which means I may receive a commission if you purchase through my links, at no extra cost to you. Please read the disclosure policy for more information.
This gallery compares the visible effect, application method, shade choice, product finish, and realistic wear trade-offs. It won't promise that every before-and-after result will look identical on every lip shape. Your natural border, lip texture, undertone, and the formula you choose all affect the final image.
1. Overdrawn Lip Liner for Fuller-Looking Lips
The most noticeable change comes from moving the outline just beyond the natural vermilion border, but more space isn't automatically more fullness. A controlled overline creates a slightly larger-looking canvas, while a broad line around the corners can make the mouth look painted on.
For the most natural before and after, keep the outer corners close to their real position and add the extra shape where the lip naturally projects. Fuller-looking lips usually come from the Cupid's bow and the center of the upper or lower lip, not from enlarging every section equally. This targeted approach is also recommended in practical fuller-lip guidance from The New York Times Wirecutter and L'Oréal Paris.
Practical rule: Start with a pencil-thin line, then build. You can add width, but you can't easily erase an overdrawn corner without restarting.
Choose a natural lip-tone pencil for a soft enhancement, or match the lipstick when you want a more defined result. NYX Lip Liner Pencil is a useful affordable starting point because its shade range and workable texture suit both outlining and filling. Apply balm first, let it settle so the surface isn't greasy, then use short strokes. Blend the inner edge with a brush before applying lipstick, and fill the lips lightly if you want the color to remain after the top layer fades.
That method is more dependable than copying a celebrity lip exactly. Kylie Jenner's recognizable fuller-lip aesthetic, Hailey Bieber's understated enhancement, and short social-media transformations all rely on the same principle, strategic placement rather than a uniformly enlarged outline. For a step-by-step application sequence, use this lip liner tutorial.
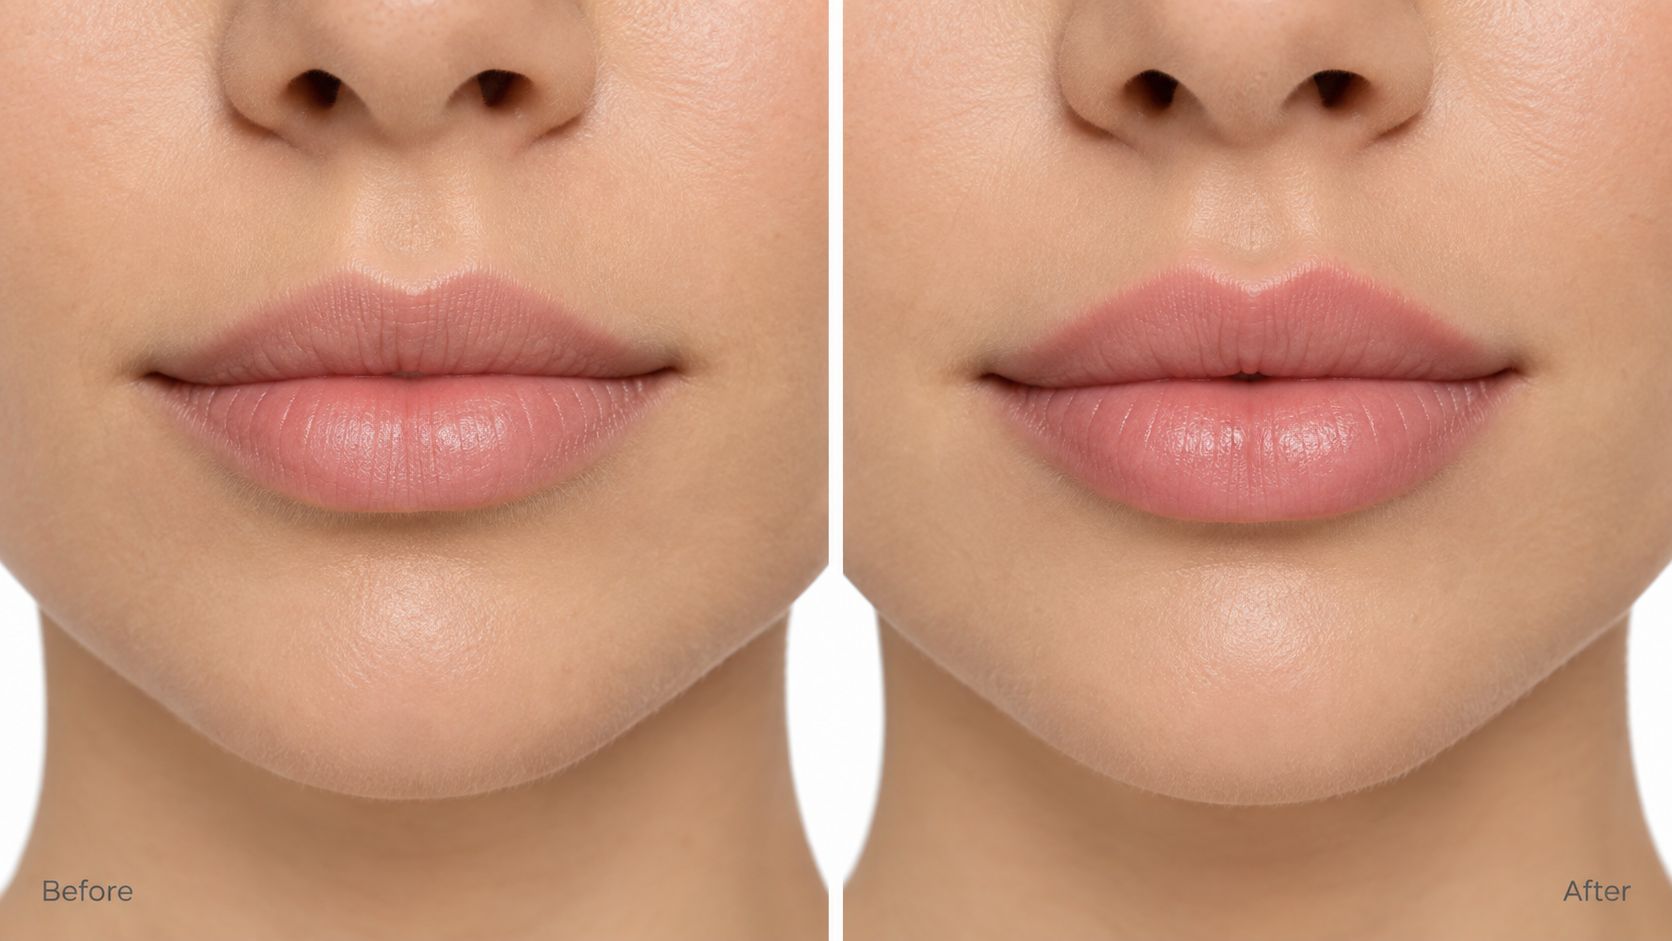
Wear depends heavily on formula. Standard wax pencils typically show edge breakdown or patchiness after about 4 to 6 hours, while waterproof or transfer-proof liners can reach 10 to 12 hours, according to Lipstick Queen's wear guidance. Creamier hydrating formulas may fade sooner, but they're often more comfortable on dry lips.
2. Ombré Lip Liner for Gradient Lip Color Transition
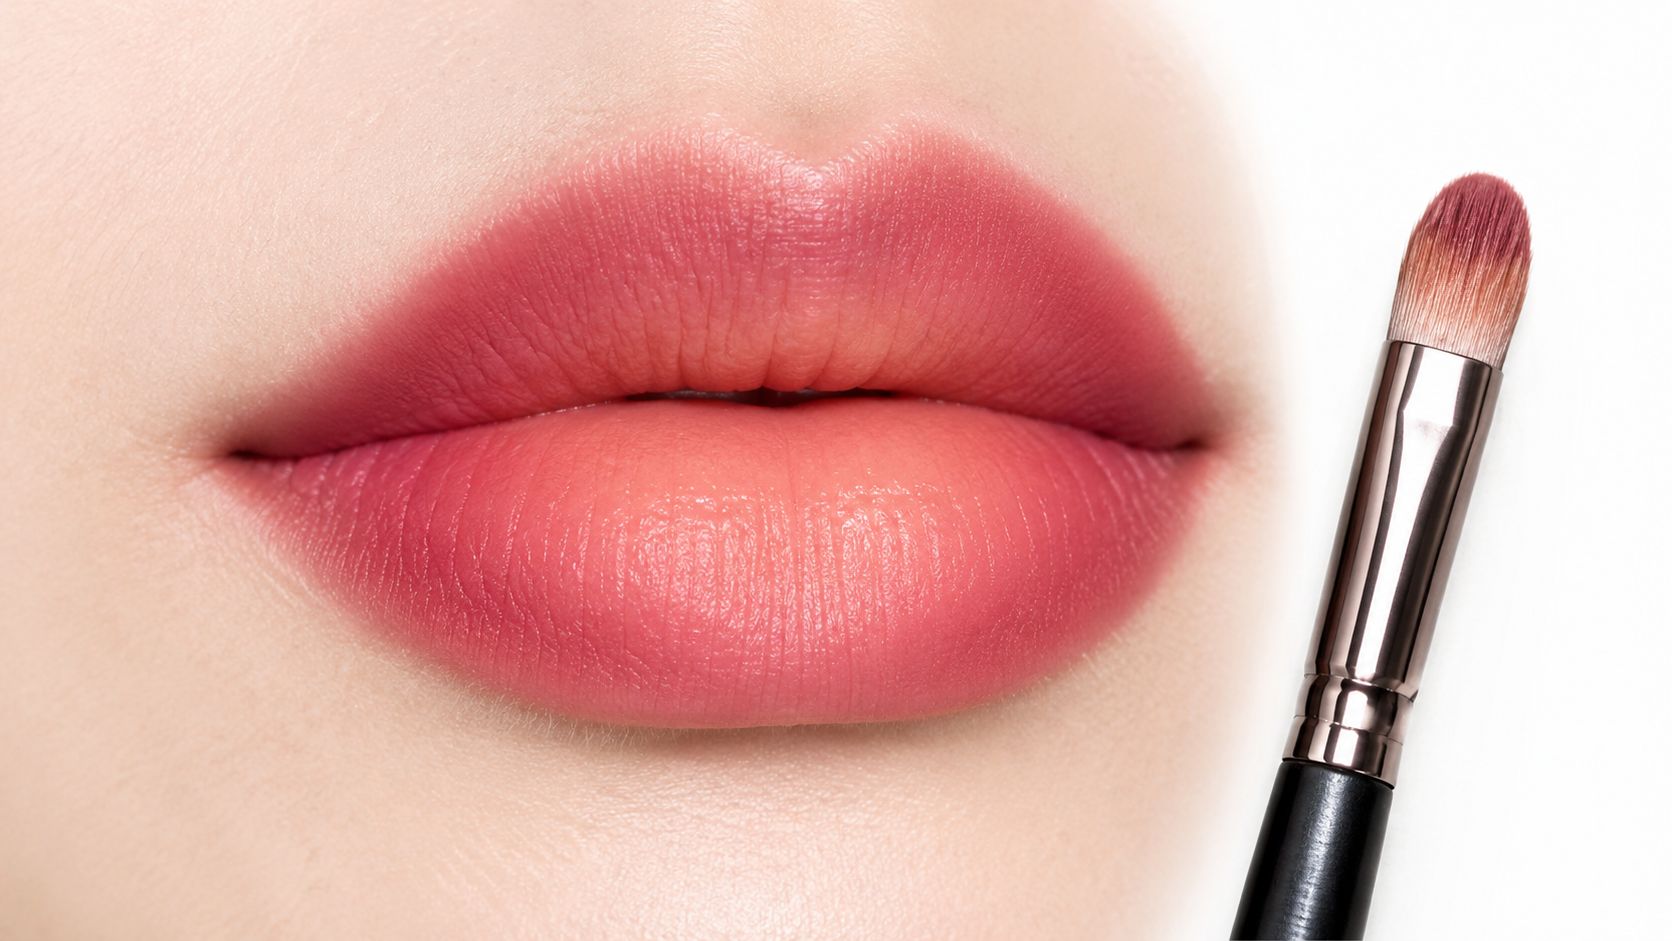
An ombré lip changes the before and after through color migration toward the center. The darkest shade frames the mouth, a middle tone softens the transition, and a lighter lipstick, liner, or gloss makes the center appear more dimensional.
The technique works best when the undertones agree. Pair warm brown with peach, terracotta, or warm nude. Pair cool berry or mauve with pink, rose, or blue-based red. A warm dark liner around a cool pink center can look muddy rather than sculpted, especially in daylight.
Build the gradient in layers
Start with a darker pencil at the outer edge, concentrating color at the corners and along the natural border. Add a medium shade just inside that line, then place the lightest color at the center. A clean lip brush can soften the meeting points without erasing the darker frame.
The affordable e.l.f. Cream Glide Lip Liner works well for this type of application because a creamy pencil gives you time to merge shades before the surface sets. ColourPop Lippie Pencil is another practical option when you want a more matte, saturated frame. A lip stain underneath can help anchor the deepest tone, but use a light hand because stains make corrections harder.
“The most flattering gradient usually has no obvious stopping point between shades.”
For a wearable version, try a neutral brown edge with a rosy nude center rather than beginning with a dramatic berry combination. The before and after should show depth, not three visible stripes. A balm-touched brush can soften the transition, while a small amount of gloss in the middle makes the lips look more rounded.
This look photographs well because the darker perimeter creates structure and the lighter center catches light. It also has a clear trade-off. More contrast produces a stronger editorial result, while a subtler shade difference looks easier to wear in person. Reapply the center product first after eating or drinking, since balms and glosses generally disappear before the pencil at the edges.
3. Nude Lip Liner with Bold Lip Color Contrast
A bold lipstick doesn't always need a matching bold pencil. A neutral nude liner can create a controlled perimeter, soften feathering, and let red, berry, or vivid coral remain the focus. The before and after looks more polished because the outer shape is stable without adding another competing color.
Test the nude against your jawline rather than your hand. A beige pencil with a pink undertone may look gray against warm skin, while a caramel nude can turn orange against a cool complexion. Choose warm, cool, or neutral based on the skin and the lipstick, then apply the pencil around the full lip perimeter.
Maybelline Color Sensational Shaping Lip Liner is a budget-friendly choice for this approach, particularly when you want a creamy matte base that doesn't fight a strong lipstick. Milani Color Statement Lipliner is another useful alternative for a firmer outline. Apply the bold color with a brush so it reaches the line cleanly instead of covering it unevenly.
Control the bold center
For a red lip, a neutral liner can make the border less visually severe than a deep red pencil. It also gives you a quieter correction layer if your natural lip outline is uneven. The result is especially effective with a satin or matte lipstick, although very dry formulas can emphasize texture.
Prep matters. Exfoliate only when needed, smooth on a small amount of balm, and remove excess slip before lining. Then fill the entire lip lightly with pencil or apply the lipstick in thin layers. Blot and reapply for a cleaner, more durable finish. A translucent powder around, not directly over, the lips can help reduce migration, but it may make the surrounding skin look dry.
Shade check: If the nude liner looks obvious before lipstick goes on, it's probably too pale or too far from your natural lip tone.
Try this pairing with a classic red, deep berry, or saturated pink. The effect is more controlled than using a dark matching liner, but it still has enough contrast to read clearly in photos. For affordable lipstick pairings, explore this guide to drugstore nude lipstick.
4. Lip Liner Contouring for Uneven or Asymmetrical Lip Shape
Lip liner can balance asymmetry, but it shouldn't try to make both sides mathematically identical. Natural mouths have movement, shadows, and different curves. The best correction makes the lips look more proportionate from a conversational distance, not perfectly symmetrical in a frozen close-up.
Begin with bare lips and identify the actual difference. One side may be shorter, one half of the upper lip may be thinner, or one corner may sit higher. Use a natural-tone pencil such as the Maybelline Color Sensational Shaping Lip Liner for the map, then add lipstick over the top so the correction doesn't stand out.
Map before you commit
Use light strokes on the shorter or thinner side, extending only where the shape needs visual balance. Keep the fuller side on its natural line, or place the pencil just inside it. L'Oréal Paris' fuller-lip guidance also supports keeping the outer corners close to the natural border while concentrating changes toward the center.
- Shorter side: Extend the line slightly toward the corner, then soften the extension with a brush.
- Thinner side: Add a little more color coverage rather than relying only on an exaggerated outline.
- Fuller side: Follow the natural edge closely so both sides appear closer in scale.
- Uncertain shape: Take a photo in natural light before adding lipstick, then check the result again under your usual indoor lighting.
The pencil should be thin and flexible enough to redraw without dragging. A firmer matte formula gives control, but a creamy pencil is easier to blend. If the line looks heavier on one side, don't keep adding to the other. Blur the stronger side inward and reassess.
Here is a visual demonstration of balancing different lip outlines:
Practice at home before wearing the look out. Asymmetry often looks more visible to the person applying makeup than to anyone else, so aim for a calmer, more even impression rather than a complete redesign.
5. Matte Lip Liner with Shimmery Lip Color for Dimensional Finish
This combination creates contrast through texture rather than only shade. A matte liner supplies structure around the mouth, while shimmer at the center catches light and makes the finish look fuller and more dimensional.
The strongest before and after usually comes from a matte pencil that is slightly deeper than the shimmery color, not dramatically darker. A nude or neutral matte liner keeps the result versatile. Wet n Wild Perfect Pout Gel Lip Liner offers a softer affordable base, while NYX Lip Liner Pencil gives more traditional pencil definition.
Start with balm underneath if the pencil drags, then remove the excess so the matte edge can grip. Trace the natural border, fill inward lightly, and place the shimmery lipstick or gloss mainly at the center. A brush gives better control than applying a metallic product directly from the tube, especially near the Cupid's bow.
Keep the shimmer central. Extending reflective color all the way to the corners can make the mouth look less defined and can emphasize dry texture.
This look suits evening makeup, editorial styling, and photographs taken under directional light. In flat indoor lighting, the difference may be subtler. Check the combination in more than one setting before committing to it for an event.
The trade-off is maintenance. Matte liner generally gives the perimeter more structure, while shimmer, gloss, and balm tend to move or fade sooner. Carry the center product for touch-ups rather than redrawing the entire lip. If the shimmer spreads beyond the edge, clean the border with a small amount of concealer on a flat brush.
6. Dark Lip Liner with Light Lipstick for Modern Reverse Ombré Effect
A dark frame with a light center creates the strongest contrast in this gallery. It reverses the familiar gradient direction and produces a graphic, fashion-forward result. The look can be striking with brown liner and nude lipstick, while black, navy, or deep plum creates a more editorial finish.
Start with dark brown before moving to unusual shades. Brown is easier to blend and more forgiving against a light lipstick. The ColourPop Lippie Pencil is a practical affordable option for saturated color, and Rimmel London Lasting Finish 8HR Lip Liner can provide a firmer perimeter when you want the outline to remain visible.
Apply the dark shade around the natural lip border first, then soften the inner edge slightly with a brush. Place the light lipstick in the center using a lip brush, leaving the contrast intentional but not stripe-like. A light beige or pink nude generally looks more wearable than a very pale concealer shade, which can make the lips appear flat.
Keep the composition deliberate
Minimal eye makeup helps the lips remain the focal point. If the center looks too stark, tap a middle-tone lipstick between the dark liner and light center. That creates a transition without losing the reverse ombré effect.
This style is less forgiving than blurred contouring. Uneven corners and fuzzy edges become part of the graphic design, so take time to clean the perimeter. A setting spray may help the overall makeup stay in place, but it won't prevent a creamy center from transferring during meals.
Try the look at home in natural light before wearing it to an event. Social-media filters and runway lighting can make the contrast seem softer than it appears face to face. The right version should look intentional, not like the wrong liner was paired with the wrong lipstick.
7. Blurred or Smudged Lip Liner for Soft-Focus Effortless Look
Want definition that looks soft rather than drawn on? A blurred lip liner before and after works through controlled diffusion. Choose a pencil close to your natural lip tone, trace on or slightly inside the border, then soften the edge while keeping the shape readable. The result suits readers seeking softness, especially with balm, sheer lipstick, or gloss.
Wet n Wild Perfect Pout Gel Lip Liner is an affordable option when you need a creamy pencil that blends easily. e.l.f. Cream Glide Lip Liner offers more working time before you layer color. Match the liner to your lips for the least visible transition, or choose a slightly deeper version of the lipstick shade for added definition. A pencil that is too dark can make a blurred look appear muddy.
Blur the edge, not the whole shape
Use short strokes, placing a little more pigment at the Cupid's bow and the center of the lower lip. Soften the outer edge with a fingertip, lip brush, or small sponge. Leave the center slightly clearer. That preserves the lip shape and prevents the color from becoming one flat patch.
Apply a similar-toned lipstick over the pencil, then tap on balm or gloss for extra softness. A small amount of translucent powder around the outer lip can limit movement. Keep powder off most of the lip, since too much can remove the comfortable texture and make fine dryness more visible.
Recent beauty coverage describes the modern lip liner look as “blurred and lived in,” rather than a hard 1990s outline. The finish also accommodates a naturally uneven border. Blending reduces the visibility of small placement differences, though it will not correct a strongly asymmetrical shape as precisely as contouring.
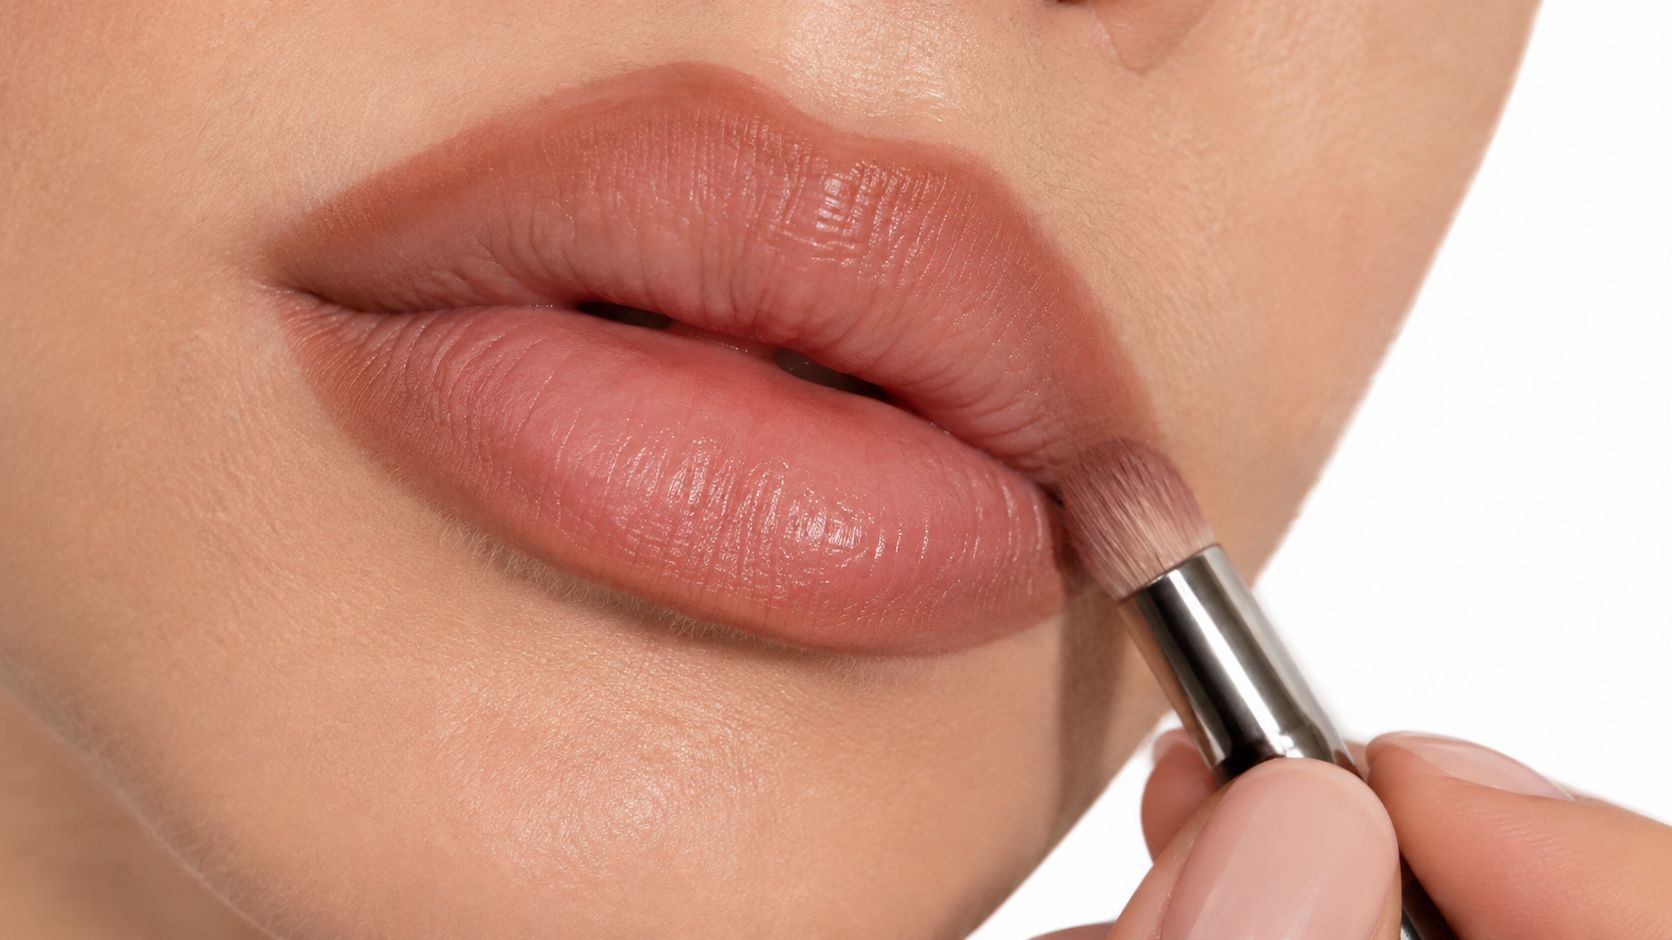
For placement, filling, and blending steps, use this guide to applying lip liner properly. Check the finish in natural light. Daylight reveals patchy diffusion that indoor lighting may hide, and a glossy formula will usually need more touch-ups than a stain or matte pencil.
Before vs After: 7 Lip-Liner Looks
| Technique | Implementation complexity | Resource requirements | Expected outcomes | Ideal use cases | Key advantages |
|---|---|---|---|---|---|
| Overdrawn Lip Liner for Fuller-Looking Lips | Moderate, steady hand and practice required | Single liner, lipstick, lip brush, balm, optional setting product | Subtle fuller, more defined lips that look natural when done subtly | Everyday wear, photos, non‑invasive enhancement | Instant volume illusion, budget‑friendly, works with many formulas |
| Ombré Lip Liner for Gradient Lip Color Transition | High, multi‑shade blending and precision | 2–3 liners, lip brushes, lip stain/base, time for blending | Sculpted, multi‑dimensional gradient that photographs well | Editorial, social media, special events, photographed looks | Dramatic depth, highly customizable color transitions |
| Nude Lip Liner with Bold Lip Color Contrast | Low–Moderate, shade matching important | Nude/neutral liner, bold lipstick, lip brush, setting powder | Polished bold lips with controlled edges and reduced feathering | Professional settings, red carpet, everyday bold lip styling | Prevents feathering, makes bold colors more wearable |
| Lip Liner Contouring for Uneven or Asymmetrical Lip Shape | High, requires assessment and corrective precision | Precise liners (varied shades), lip brush, practice, reference photos | Visually balanced, more symmetrical lip proportions | Corrective makeup, bridal, photography, clients with asymmetry | Non‑invasive customization to correct perceived flaws |
| Matte Lip Liner with Shimmery Lip Color for Dimensional Finish | Moderate, blending different finishes carefully | Matte liner, shimmery/metallic lipstick or gloss, lip brush, balm | Defined matte edges with luminous, light‑catching center | Evening, editorial, runway, glamorous events | Structure from matte + luminous shimmer for dimension |
| Dark Lip Liner with Light Lipstick (Reverse Ombré) | Moderate–High, precise contrast control needed | Dark liner, light/nude lipstick, brushes, setting spray | Graphic, fashion‑forward framed lips with high contrast | Trendy looks, runways, social media, editorial shoots | Bold, modern aesthetic; enables experimental color play |
| Blurred/Smudged Lip Liner for Soft‑Focus Look | Low, forgiving technique, easy to learn | Liner, sponge/brush or finger for smudging, balm, light lipstick | Soft, natural‑looking lips with diffused edges | Minimalist/no‑makeup looks, everyday wear, natural bridal styles | Effortless, flattering, conceals imperfect application |
Frequently Asked Questions
How far should you overline your lips?
Overline only where you need extra visual fullness, usually around the Cupid's bow and the center of the upper or lower lip. Keep the outer corners close to the natural border. A subtle change is generally more convincing than drawing a new perimeter around the entire mouth.
Should lip liner match lipstick?
It can match, but it doesn't have to. A natural lip-tone liner works well with sheer colors and fuller-looking techniques, a neutral liner can steady a bold lipstick, and a darker complementary shade creates ombré dimension. Always consider undertone, not just depth.
How can you make lip liner last longer?
Prep with hydration, remove excess balm, apply the liner in short strokes, and fill the lips lightly before adding lipstick. Standard wax pencils typically last about 4 to 6 hours, while waterproof or transfer-proof liners can reach 10 to 12 hours, depending on the formula and conditions (Lipstick Queen). Eating, drinking, lip texture, and gloss will still affect the result.
Which lip liner technique looks most natural?
Blurred lining and targeted overlining usually look the most natural because they preserve lip shape and soften the border. Use a shade close to your natural lip color, keep the corners precise, and blend the outer edge rather than leaving a strong ring.
Find Your Best Lip Liner Transformation
Choose the technique according to the result you want, not the celebrity or filter you're trying to copy. Subtle overlining adds fullness when the extra shape stays concentrated at the center. Contouring helps balance uneven sides without forcing both lips into an identical outline. Ombré creates dimension through graduated color, while a nude liner under a bold lipstick gives impact with a cleaner, more controlled edge.
For texture contrast, matte liner with shimmer at the center creates light-catching dimension. Reverse ombré delivers the most editorial effect, especially with dark brown and pale nude. Blurring is the better choice when you want softness, comfort, and a finish that can fade without leaving a harsh ring.
The best affordable starting point across these practical use cases is the NYX Lip Liner Pencil. It can support a natural overline, a bold lipstick perimeter, a matte-and-shimmer combination, or a softer blended result. That doesn't mean one shade or formula will suit every person. Your shade match matters more than the product name, and a thin first layer is easier to adapt than a heavy application.
Test the pencil in the lighting where you'll wear it. Check the corners, smile, drink, and speak before deciding whether the before and after looks balanced. If the product feathers, fill in more of the lip or switch to a longer-wear formula. If it feels dry, use a small amount of balm underneath and reserve the softest finishes for comfort.
Finding Favourites is relevant for readers who want to compare affordable alternatives by shade, texture, finish, and wear, including lip liner guides and budget-conscious beauty swaps. Start with the result you want, choose a pencil that supports that finish, and let blending do more work than extra product.
Finding Favourites offers practical beauty guides and affordable dupe roundups that compare luxury-inspired makeup by shade, finish, texture, and wear. Visit Finding Favourites to find a lip liner match, explore budget-friendly makeup alternatives, and discover new ways to recreate polished looks for less.